
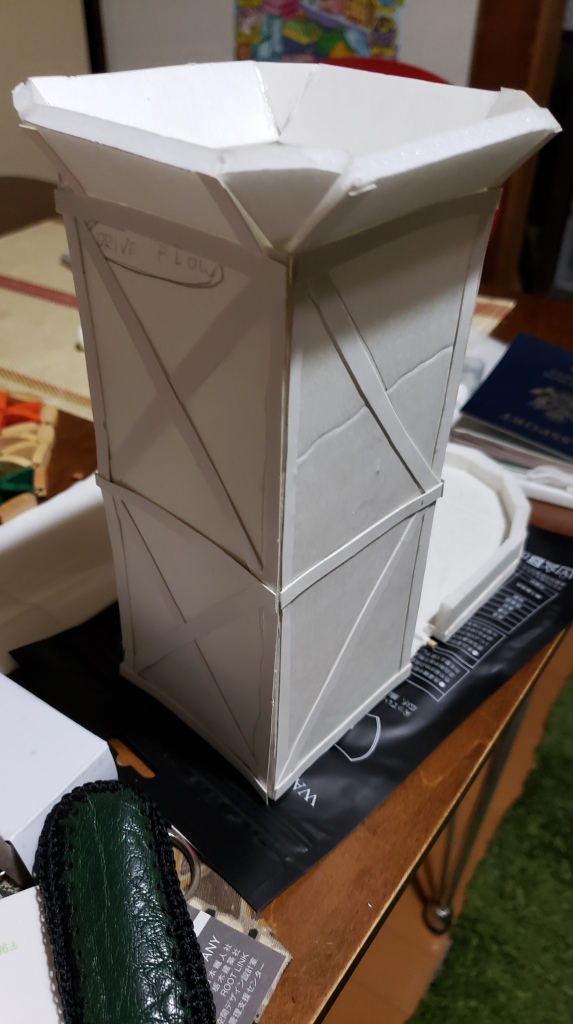
So I made a dice tower a while back when I got into blood bowl. I actually made two dice towers. One hastily fashioned from cardboard and hot glue and decorated with paint markers. This was my ‘test’ to see if it could be done and to get a feel for the new project. And another made a bit more lovingly and carefully from foamcore with a few more bells and whistles.

So I made these two dice towers and at the time I was using dice for blood bowl that I had made myself because I didn’t have any “official” ones. The made ones were a little chunky and more edged than the rounder ones put out by GW. Also, I used the same paint pens to decorate those which gave them a kind of friction element which ultimately made them get caught up in my foamcore dice tower in addition to rubbing paint all over it which I didn’t care for either. But they seemed to flow more smoothly enough through the coincidentally smaller cardboard one fine and the cheapness of the cardboard one meant I could slam the dice with more authority into them when I was getting emotional about pretend board game football. Thus, my poor (Although more lovingly crafted) foamcore tower found itself on the sidelines while the cheaper crappier cardboard one saw me through almost an entire season of blood bowl on its own. Please check out my league’s page here. Another loving creation of mine that I have spent my time on recently.
So anyway my dice tower.
I won’t bore you with the details of the tower build itself which is to say I didn’t document it and made it before I had this blog and sadly didn’t take many pictures then either. I will take a dive through my historical photo gallery and see if I have a few laying around in the future. Maybe. If you are very curious, I used this tutorial for my cardboard tower looking for something simple and cheap (googled ‘how to make cardboard dice tower’). I applied the same concept with some flare to my foamcore one. So! Here is where we pick up on the story:

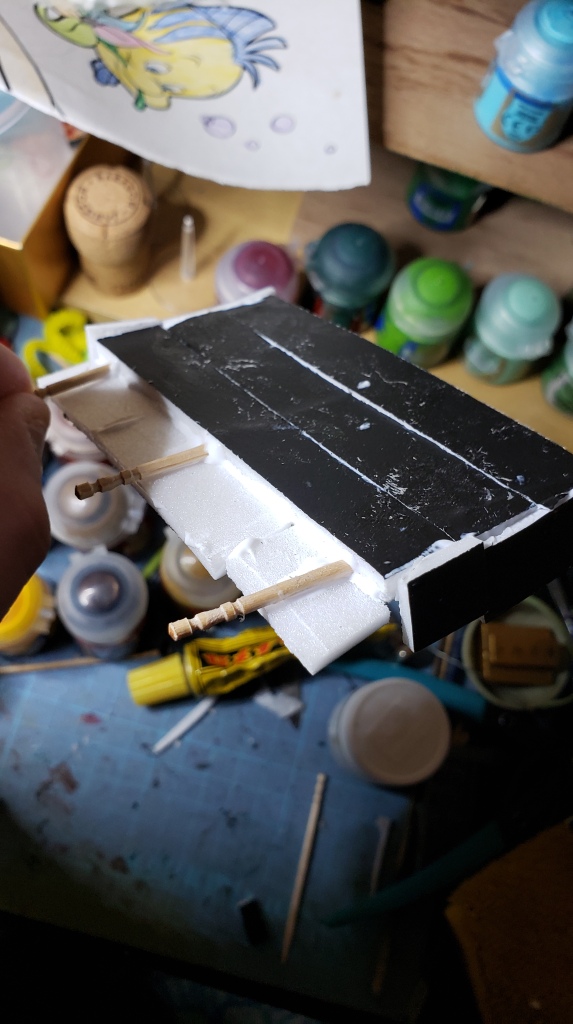
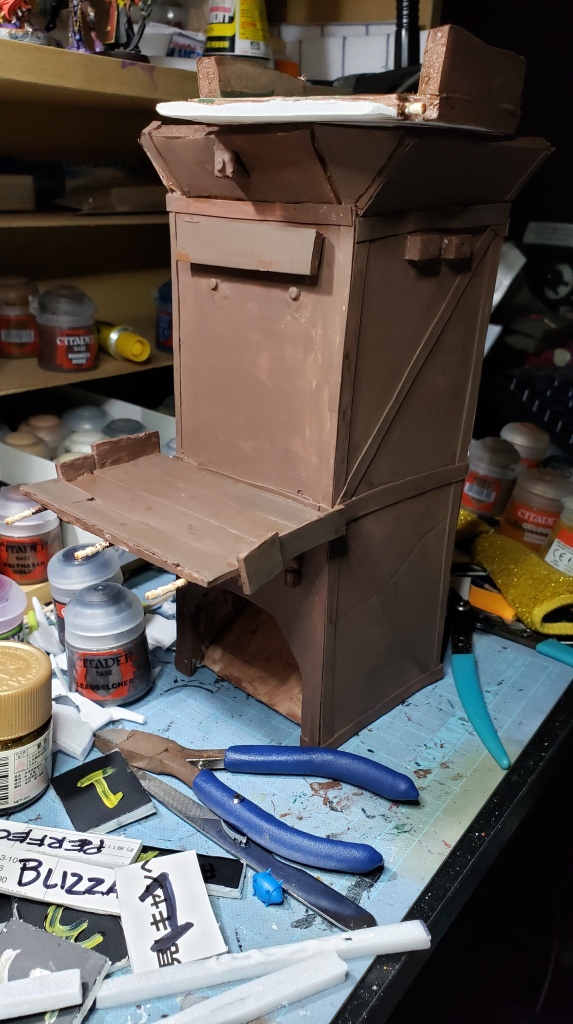
So you can see the main box of the tower itself which houses the baffles. And the curved rolling tray I made as well. If anyone ever cares enough to comment or get in touch about it I can talk in depth about the tower and its inner workings and smaller bits that don’t get touched on in this log.
I cut some card into thin strips and glued it on the exterior with white glue to give it the impression of being made of wood and having cross beams, etc. I also did some penciling in where I planned on putting some more embellishments as well. Below are images that I used for inspirado (Googled ‘blood bowl dice tower’):


The direction I am taking it.
So from the comments on the inspirado, you can see that I am not such a fan of permanence of the platforms, things hanging off, and sticking out, or the large footprint of the tower. Why? Aesthetically I love it all. Pragmatically, I live in Japan and tablespace is at a premium and gaming at home isn’t always an option which means the Red Magician needs to travel. Besides models and dice, almost everything in blood bowl breaks down to be pretty flat so a dice tower ends up being quite a haul on its own. With all those bits hanging off it would be a recipe for destruction and with such a large footprint I’d be hard pressed to have any space for my witches brew after considering the pitch, dugouts, laptop, rosters, etc.
So what that means is I want portability, and to limit pokey-outy bits where possible. I also want a beautiful dice tower that is useful and ultimately aesthetically pleasing. I think I can make it happen.
The Tower

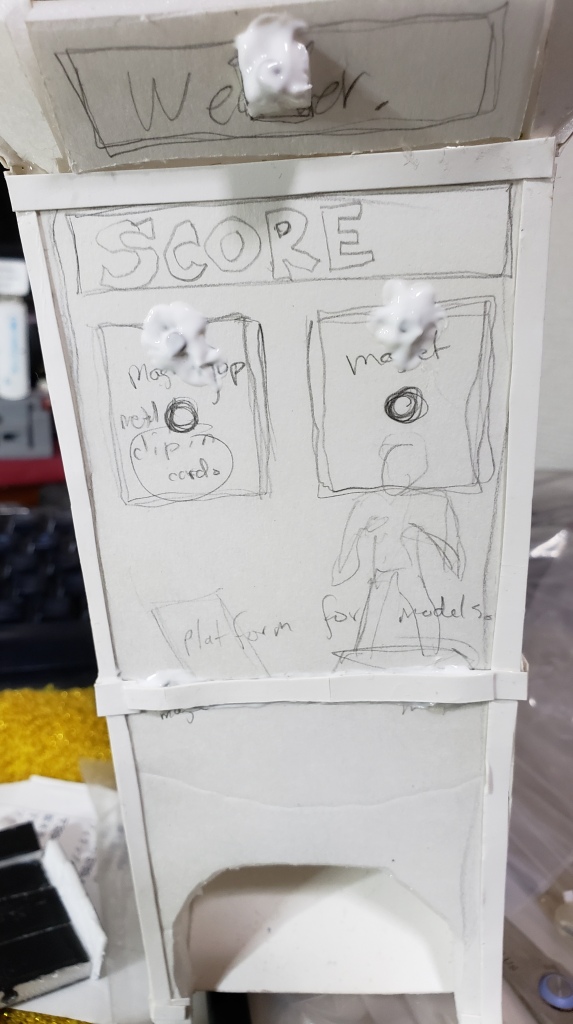
So the three main elements I want on the front of the Tower are 1. The Weather, 2. The current Score, and 3. A platform to place models, extra score cards, etc. The Yellow dots show where I intend on gluing magnets.
Yes! Magnets. Most if not all of my inspirado use little dowels or nails or paperclip snips to create a space where cards can be hung from. It’s easy and effective and looks good in setting as well so immersion wise it is clutch, but in my mind all I see are books, papers, models, my backpack, etc. getting caught on it and scractching and tearing or otherwise ripping indiscriminately into things. I know I know, “How the hell are you transporting that thing to the point where it can cause so much damage?” To that I say, Praise Nuffle.
Just get on with it.
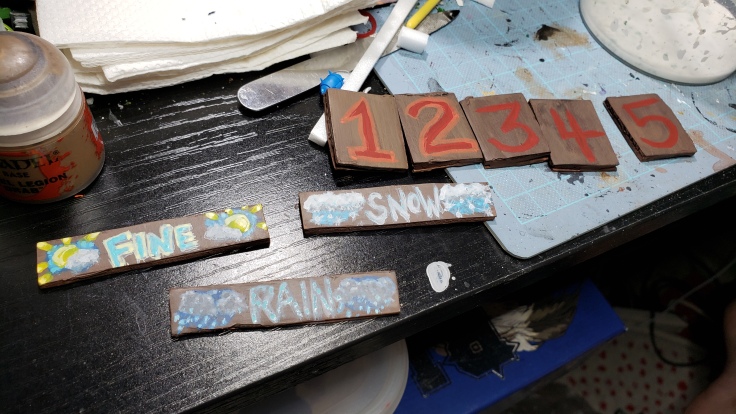
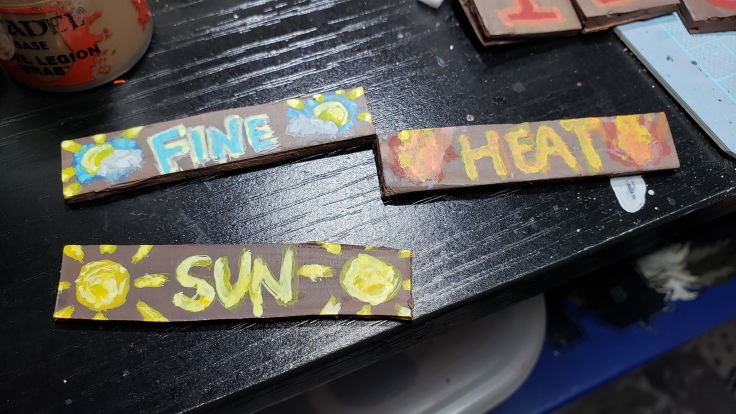
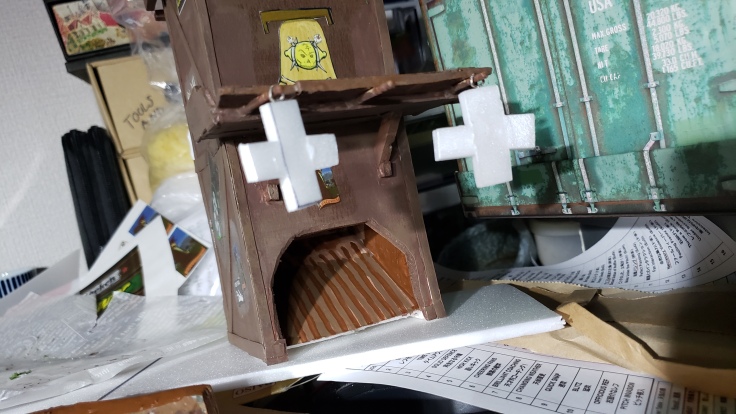
Right. So magnets. #1, I need a place for the weather and I want it out of the way. It is important information during the game, but ultimately once it is set, you don’t really need to keep it in mind unless you roll a 2, 3, 11, or 12. So I added a little nub of foam, slapped a magnet on it, and intend on having a set of wide sign boards to represent the weather up top above the score descending from the beveled tower top.
[Side note!: I made the towers with a beveled top in order to allow for some light short distance throwing/ overhead slamming into the tower to get that extra oomph needed when charging dice rolls with emotional energies. That it allowed for a hanging sign was a happy accident/opportunity. From experience with the towers in play it is satisfying and a good design choice in my humble opinion.]
#2. The Score cards. So again I will use magnets, but how to magnet up score planks and to what degree were something I had to consider. But it should be fairly painless and I thought I could just shove some paperclip snips into the foamcore and things should stick well enough from both sides I hoped.
#3. The platform. I am no stranger to making scratch built terrain and had just the piece of leftover foamcore for everything I needed so just used it and would just mag it up.
Preparing the fiddlies.
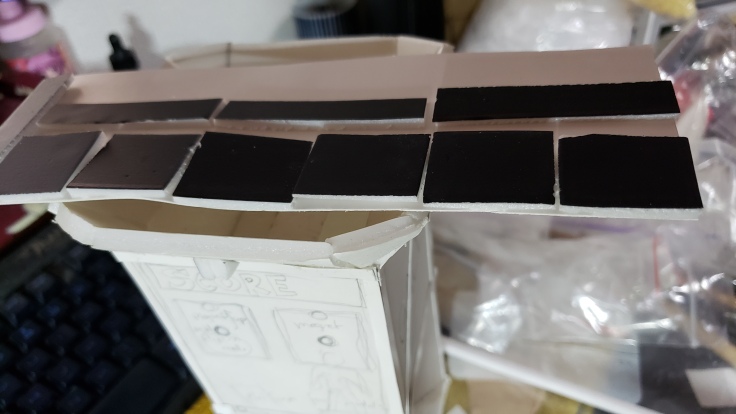
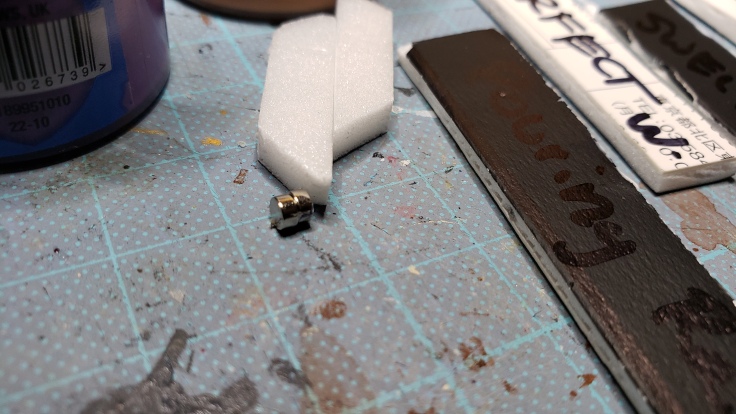
So for the sign boards and score number cards I decided that the full thickness of foam was a little bulky for my designs and also meant I would have to double or dare I say it triple the amount of paperclip I would have to shove in there to get the attraction I wanted and still have them be double sided. Thus, I cut out the score card squares (And weather signs), and then sliced them ‘carefully’ through the middle of the foam making two “identical” pieces of very thin foam core. Needing card on both sides I used PVC glue and glued them as you see above to a piece of card.
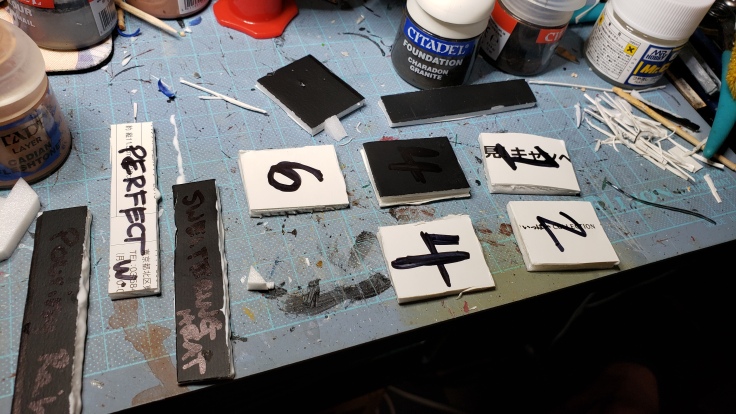
So I am a fan of slathering glue all over stuff. I cut out my now thin foamcoare cards, trimmed the edges to clean them up a bit, and slathered. What did I slather? Glue. Where? Around and inside the edges. So my ‘precise’ foamcore splitting ended up leaving more than a few gaps between the foam and card so I needed to do some gap filling and also seal the foam for when it comes time to spray and pray. I think it also adds a nice little texture to the outside as well that gives it some personality when you drybrush it kind of taking away that ‘its painted foamcore’ aspect.
Wanting to preserve my magnet usage which will ultimately make using this annoying to a degree, but also save my magnets so I can be buried with them instead of having a easy time of things, I opted for snipping and stabbing snips of these into my foamcore cards near the top so they could hang down. After they were secured in there with white glue I glued over the little opening where they were shoved in to create a kind of coating so they didn’t pop out.
The Platform

So I cut all the squares and stuff for the score cards from a spare bit of foamcore and was left with a thin strip which I hastily cut into similar lengths and glued them together. Stabbed them through with toothpicks. Cut scraps into thinner foamcore and glued them on the sides as a small barrier. Did the same and extended the platform and then slathered glue where it may fall.
[Why the toothpicks? Well, I tend to use loom bands or other small trinkets and having a small place to hang them might be interesting if that is ever something that comes up. Also, I could hang pennants or team regalia of sorts from there to add some flavor as well. They also shore up the glue and fasten the platform together. Do they stick out? Yeah, but they won’t be glued to the tower proper.
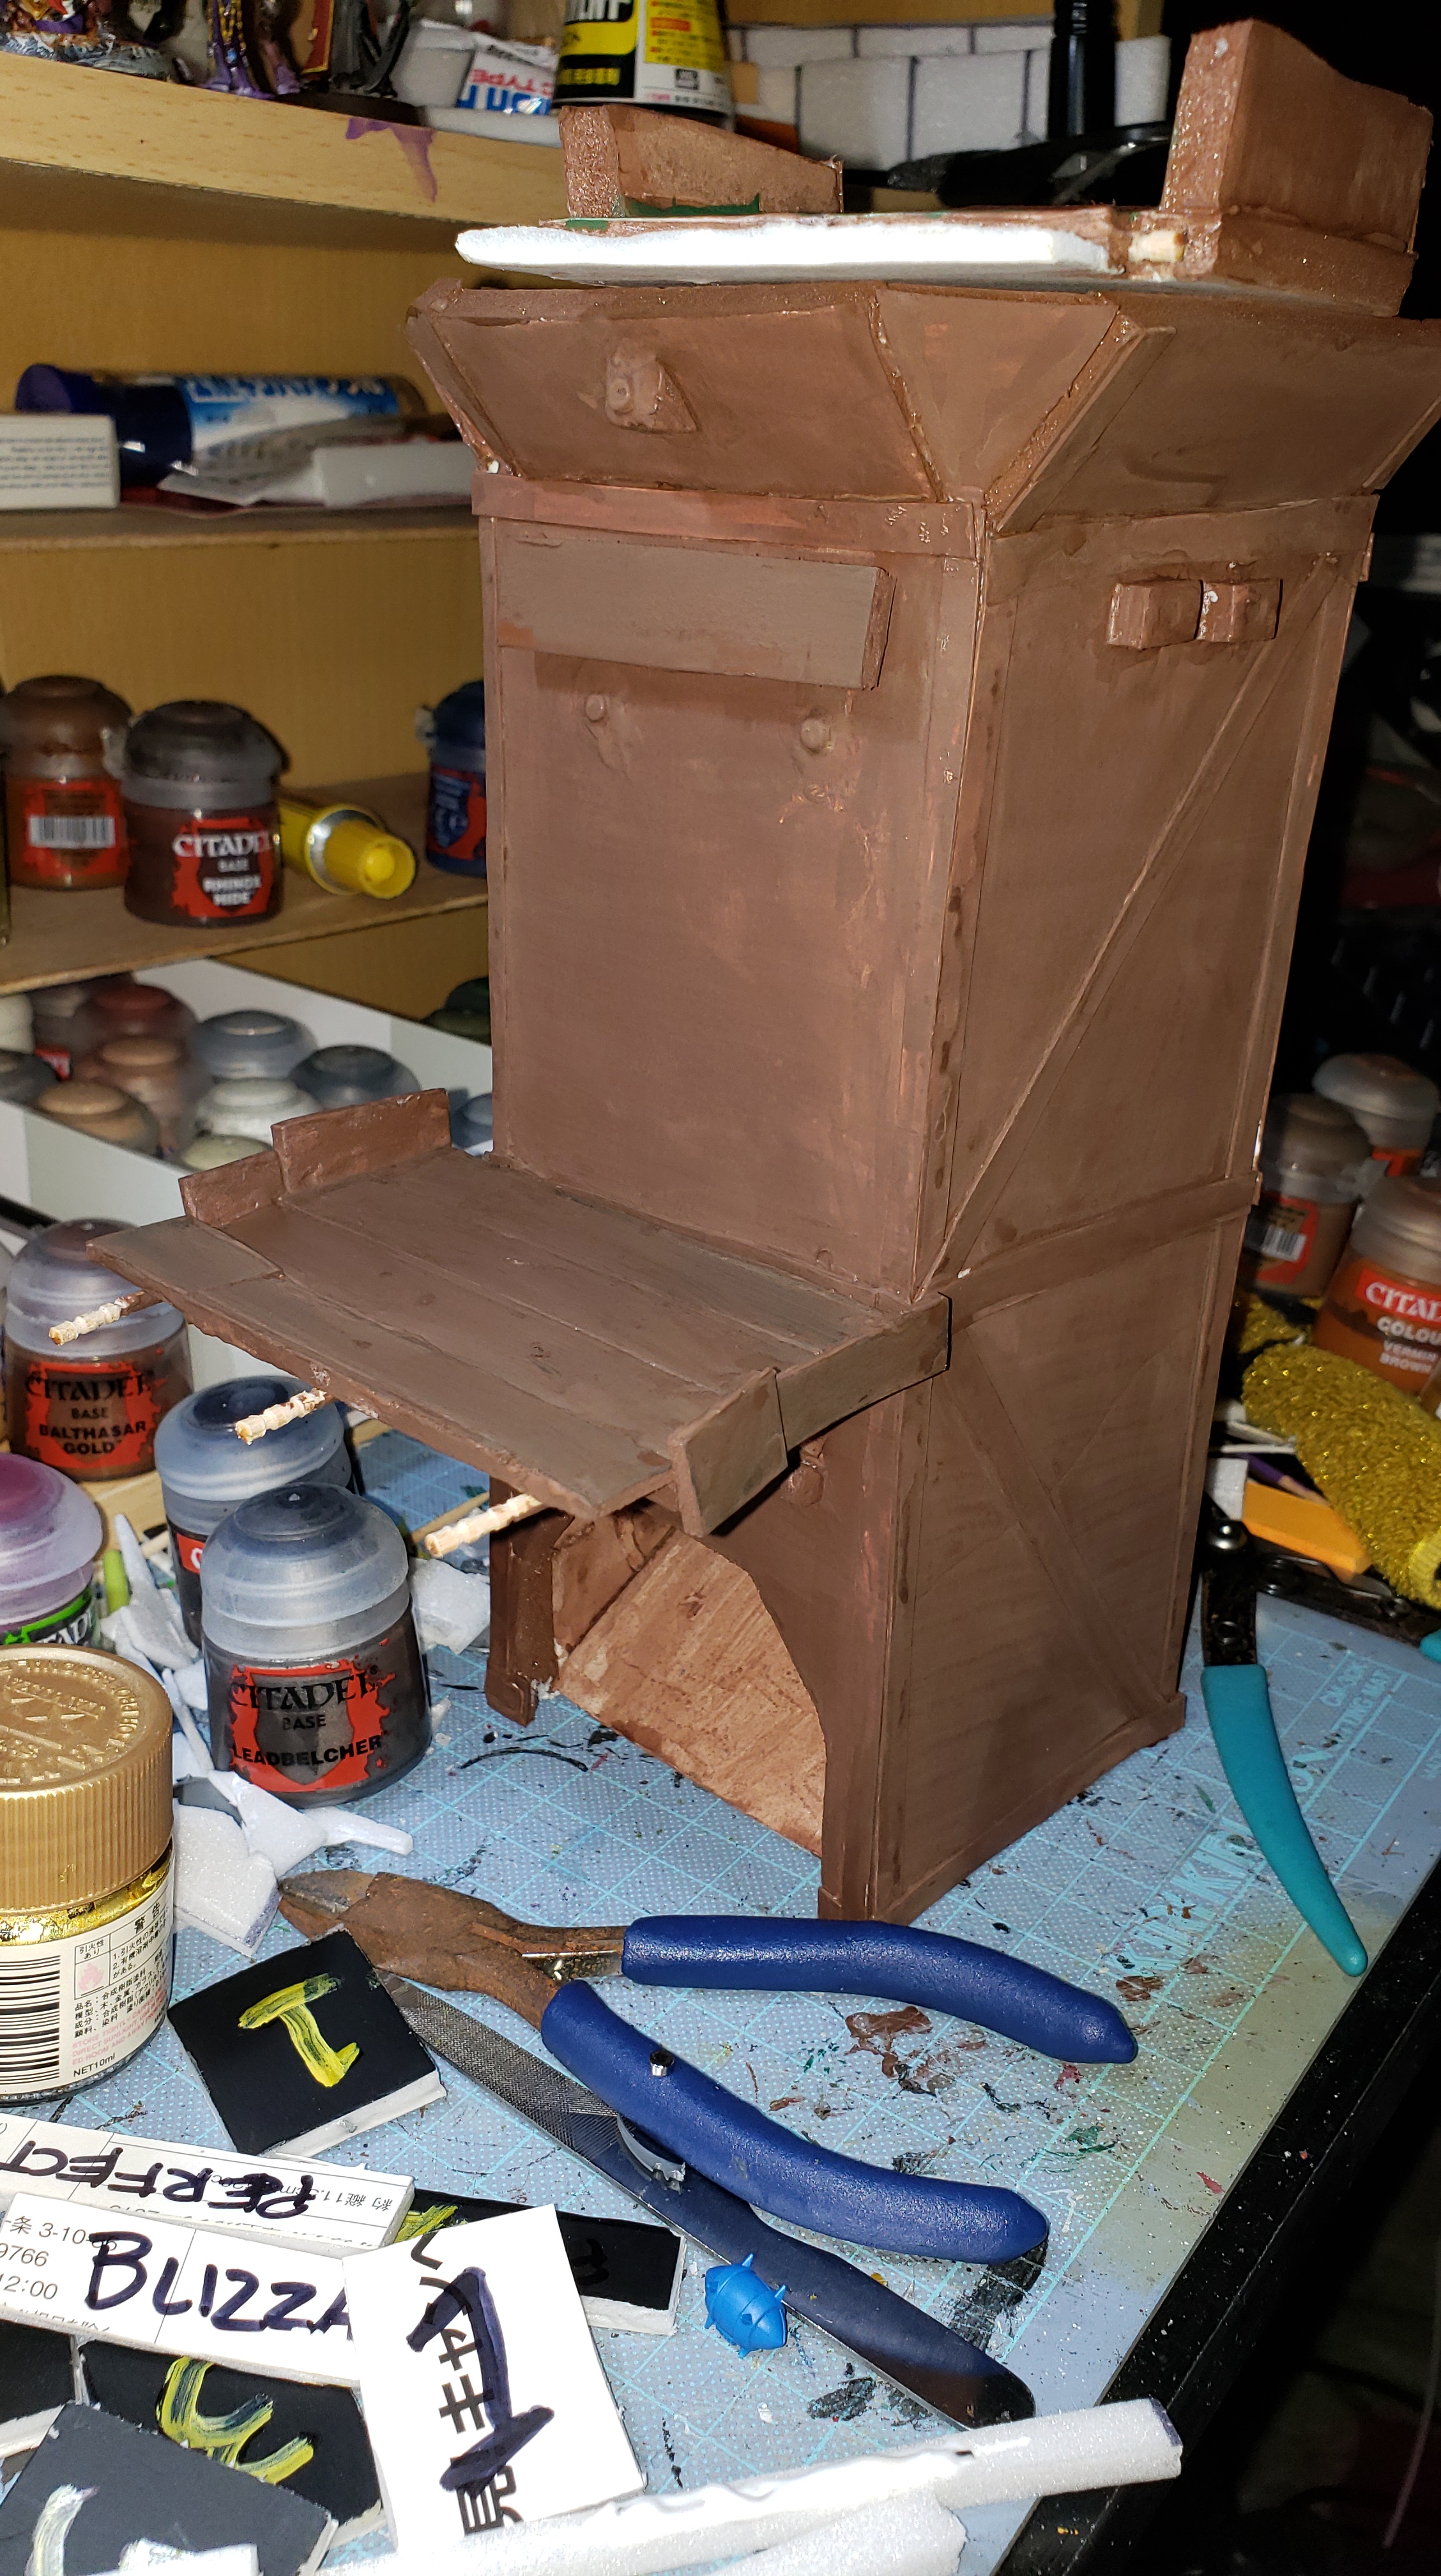
The Tower Proper
Working with magnets can be annoying. Infuriating at times really. Especially when you aren’t just using metal to stick on, but need to keep polarity in your sphere of concerns. And when they are ultra small it just escalates things.
So I glued them with little care onto the weather and score areas since those were intended to stick on with metal so polarity wasn’t an issue. I used a super glue to get them on there nice, and then slathered white glue on top to bury them in (Pictured above, still wet). I also covered the magnets with polarity cared for below for the platform since I will be adding magnets to the platform itself as well to insure a solid grip. Also because I second guess myself endlessly during polarity checking and couldn’t wait so with a little card cover I could test to make sure they were still the right direction without pulling them out again and again. Although I did pull one out from the glue once during testing.. (Or twice or more times I don’t care to recall….)
The platform on the other hand needed to be load bearing to a degree and my small magnets and snips of metal weren’t up to the task. In fact the magnets paired as well weren’t really up to the task either as you will see. They are small!
Got those badboys off ebay. Like 50 for some small amount of money and haven’t used em all yet despite doing a few 40k vehicles and a fair few tau battle suits. Also pictured there are the buttresses which will support the tower when I attach them on. After getting a little time to dry, I gave them all a try to see how they went.
Initial Testing
So the initial testing went well! Enough… Also, the glue slather dried real nice and didn’t interrupt the magnet’s attraction. The numbers are done for now and so are the signs until painting. The platform will need some more support in order to bear the weight of more than one or two super light plastic models. I will affix the buttresses (Just googled it and apparently I mean to use the term braces. I will not amend writing buttress until now. It’s basically an upside down buttress which is still funny. But I will use braces going forward.) So if the two small braces (Pictured above behind the picture showcasing my little magnets) are not enough, then I will add a third one which will go a bit lower and extend a bit further which should do the trick.
Preparing the landing tray.
So the tray itself is fairly shallow, but it is more than enough for regular play. Also while I am really interested in putting a fence on/around it, I have a feeling it will end up being bulky travel-wise or blocking the view of the dice after they are rolled. It already looks like a mund of grassy earth which has been spread out so that is what I am going for. The urge to have a random direction D8 template in there is tempting, but I already have some of those available and don’t know where the tower will end up anyway.
So I am going to embellish the hill in one or two key locations where a little bit extra embankment can prevent the escape of dice. The goal when I designed the dice tray originally was for the dice to roll true and be easy to grab once rolled. I have found that with current dice trays it is a little tricky for my gross sausage fingers to shove into the confines of the small areas so I want to try the open layout.
Currently with how it came out after the ballast and flock went down, I covered it in glue water and painted it up. Going to do something to embellish the outside of the base, but realized that there was an issue. Dice often get hung up in the crook between the base and the dice tower itself. I will remedy that later.
Can’t just leave it there now can we?
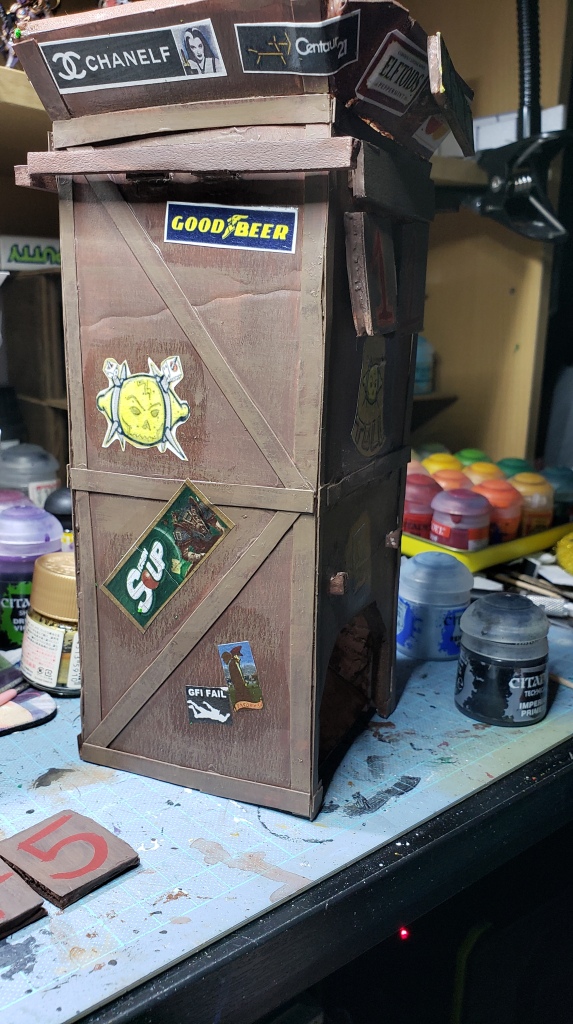
In addition to the score and weather, and also being a dice tower, I also wish for it to serve another purpose, or multiple other purposes. Namely, I wish to have access to information needed when looking at/near the dice tower. For blood bowl this is largely the kickoff chart and potentially the prayers to nuffle at a glance as well. Previously on the cardboard tower I just wrote on the side of the tower as it was that simple. But I don’t really think that will suit my needs this time around and I want to add some flair.
Similar to the weather magnet on the front, I want to have sets of magnets on the sides which will allow me to hang/drape a ‘banner’ down on the sides which will be covered in information. Maybe even make it double sided as well allowing for further customization. I am also considering adding one to the back as well, but that may be going to far since typically one wouldn’t lean over far enough to look at the back of it. Perhaps I will just put my league logo on there or decorate it with posters, graffiti, and such.
Final pre-paint touches.
Before we spray this bad boy, I wanted to make a few final touches. Add a little tactical gravel and texture here and there, spackle/epoxy it all in place. Seal the open foam locations with glue/water mix like I did with the base above.
Painting
Going to paint the majority of it nice and simple. Spray black, potentially reseal open foam that melted away, spray brown. Then get some cheap paint and paint grey on the stony bits in the ground. Paint green on the grassy bits. Then drybrush the wood a lighter brown and do it tactically in lines that seem to go with the ‘grain’ of the wood. Do a wash and do that again building up texture. Paint the signs/score numbers. Paint the platform. Do the ground and grass around the landing tray up real nice with greens, washes, and drybrushing. Take care in painting the area on the front of the tower so that using it is intuitive and score being 0 to 0 is clear. Same with the magnet areas. Painting and preparing the banners.
Finishing touches
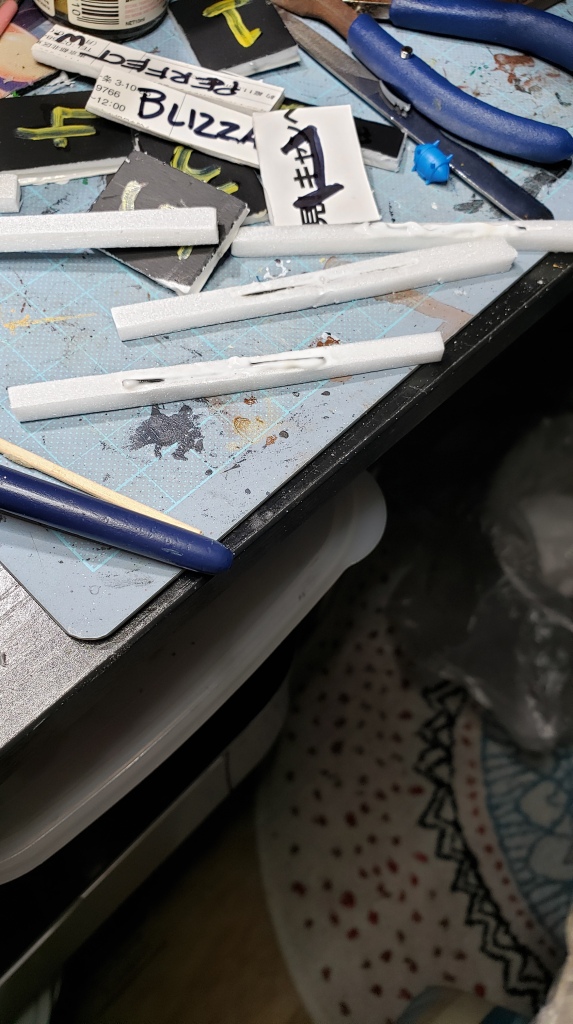
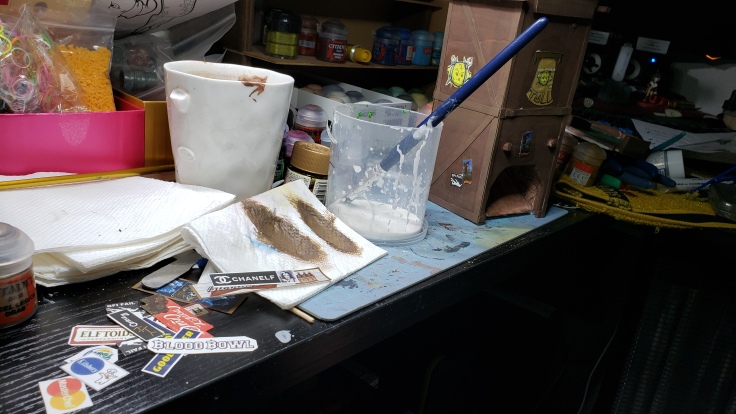
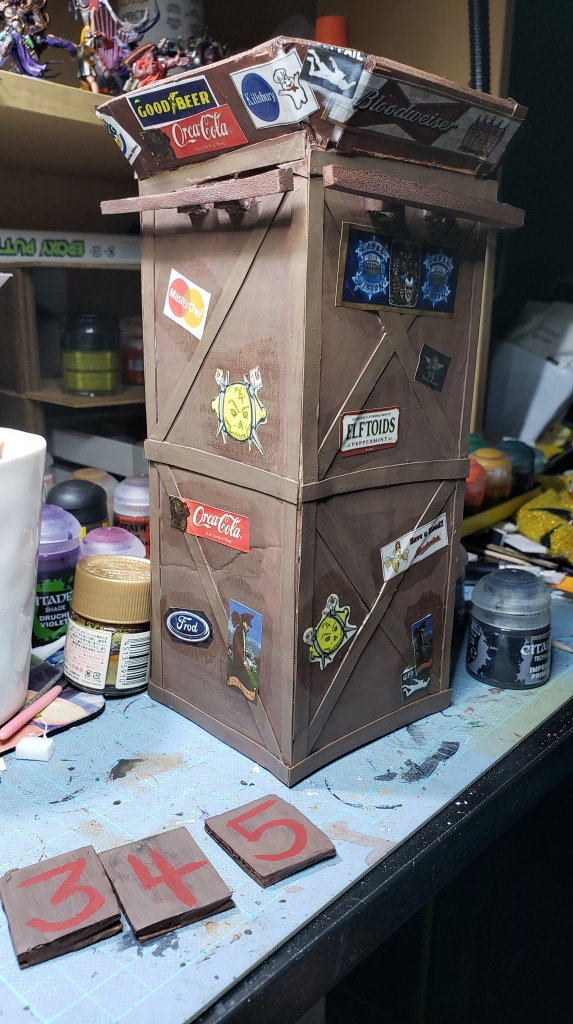
At this stage the project has been going on for far too long and I can barely remember what I wrote or planned for the tower and things just kind of got on on their own haha. But After a basic paint job, I wanted to slather the tower in adverts, league regalia, posters, etc. I loved this look and my expeditions into making Munda terrain cemented that fact. This is what my workspace looks like during that endeavor.
Print out and carefully cut the adverts and do some glue where you want them, stick em on, and slather glue all over them until they are flush with the surface or how you want them to be. They leave a minimal sheen after they dry.
Other Baubles
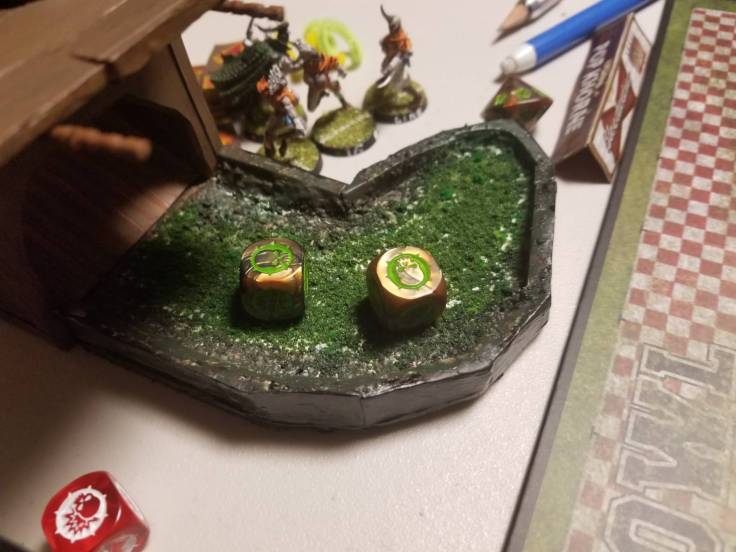
I had just played a game and forgotten my apothecary AGAIN and was furious when finally the pieces slipped into place.
It came to me. I saw the three toothpicks which I had randomly stuck on there thinking to dangle something from them, and it hit me like a ton of bricks! Three picks, one per player, one shared in the middle…. I made a pair of apothecary tokens and taking a clue from things I have seen online and the BB2 PC game, a lightning bolt-shaped blitz token as well.
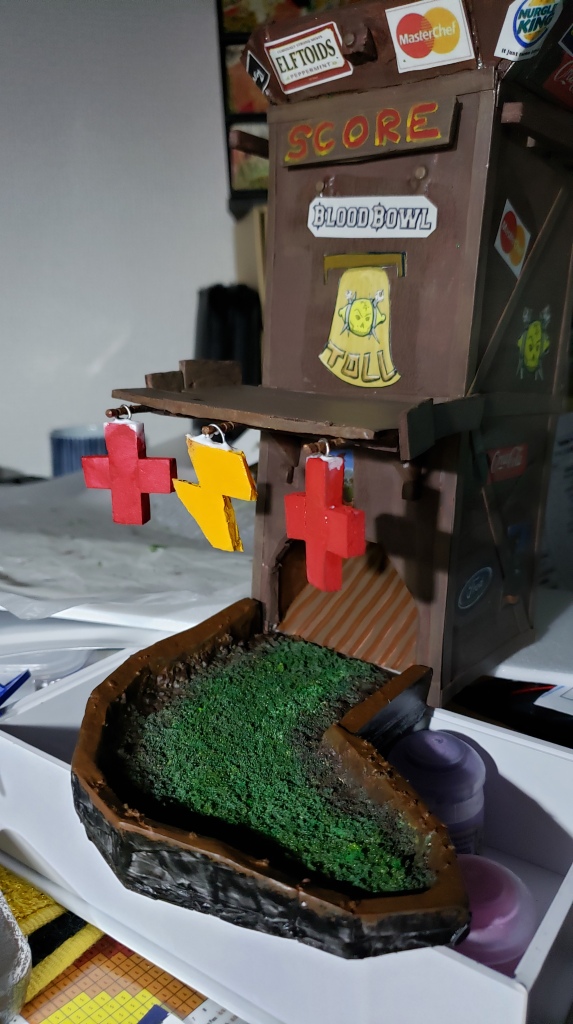
The tokens are a bit crude, but I made them on a whim a day or two before the coming game and just banged em out quickly. They are simply cut from foam and I bent a paperclip and stabbed/glued it in the top so it could loop around the toothpick and alternatively stick onto one of the myriad of magnets I have glued to this construction. I have since painted them a second time and when I finish the final final touches will take some proper pictures to show it off.
Since finishing the tower for the most part I need to finish the shoddily painted black base with some posters/artwork/something to spice it up, and also add a little ramp/smoother to make the dice flow nicer out of the tower and onto the landing grass. After I finish those two last bits I am calling it done. I have been writing this article for what feels like months now haha. Just gotta knock it out and update this hobby blog! I have been working on a pitch for blood bowl as well but that fell on the back burner and has been an article in the works for longer than this one. Just glad to see projects nearing completion. Hopefully this or next week! (5.12)
The landing smoother

So after previous writing, and WIP usage of the tower I realized my grassy landing pad which I really like ended up causing some trouble for the dice ending up with more than a few cocked dice in the crook between the tower proper and the landing zone. So I decided to keep it simple and just get some brown paper bag paper, cut it to a good size, and then just glue it on there and paint it.
I just used regular white glue and kind of coated the whole top of the paper to get a good layer on it and toughen it up. I then painted it similar to the pattern that was already on the inside and blended it a bit with the actual landing area. It is obviously a piece of paper overlapping the ground, but I am not too concerned about it and the dice roll way better often making it all the way out to the end of the landing tray making them easy to grab even with the upper deck/dangling apothecary & blitz markers.
It was slapdash, but effective and I am happy the tower works more effectively.
The Landing’s Outer barrier
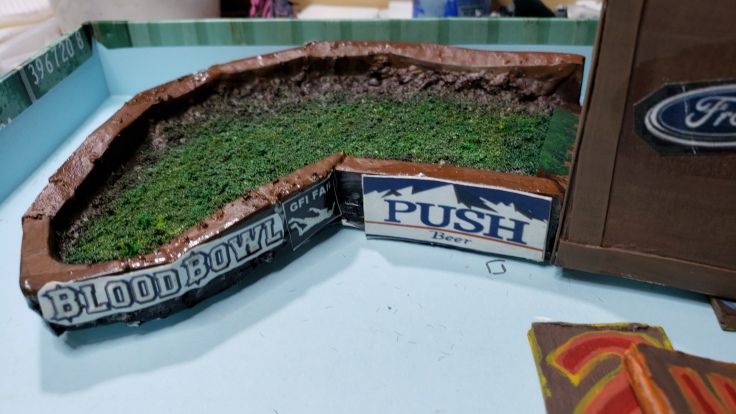
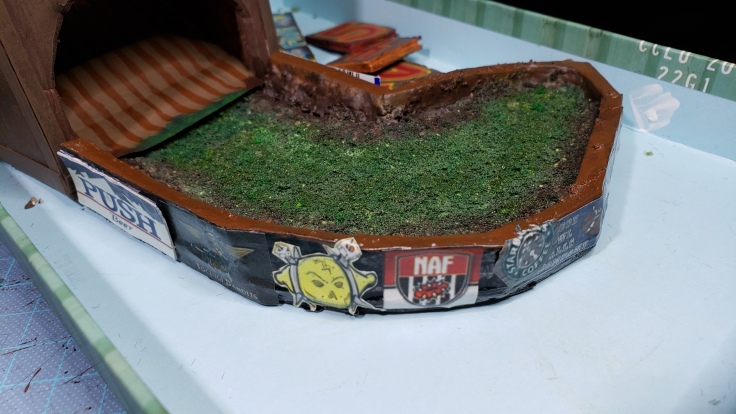
Here is the outer barrier. In some games when space is a bit tighter, I have just forgone using the lading completely which is a bummer since I put work into it, but such is the way when you have a practical issue. Also why I made the landing tray detachable! (Sure that’s it.) Either way I want the barrier to exist since the dice do fly out of the tower at a reasonable speed and without it they splash about.
So instead of leaving it as is, which is to say painted poorly since this particular part wasn’t taking the paint well and it was cheap crappy dollar store paint on top of it, I just glued on a few more adverts and other fun stuff around the base as if companies and others rushed in after the landslide/tower explosion that caused the rut in the ground and just staked in their sign posts/ads to get exposure quickly while the scenario was still hot.
The Final Product (For Now…?)
Still have room to add things like banners, etc, on the side hooks, but my need for those will arise with time. For now this is a fairly complete and quite nice tower that I am really proud of and happy to use in my blood bowl games and in general for ultra-superstitious dice rolling scenarios.
I hope you enjoyed checking out the Dice Tower build! Let me know what you think!
