
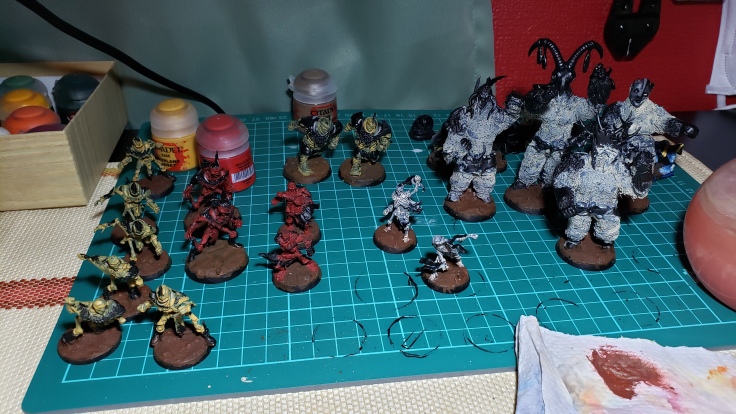
We are back baby! Fresh off getting the Necromantic painted up last week, I decided to jump right into the Shambling Undead and Khemri Tomb King Section of the job. I started the back half of the painting just like the first and got the bases done. Realizing they will need touch ups and work anyway, I didn’t spend as much time as I had initially on them and only brushed them a single slightly lighter brown and then a drybrush of reddish muddy color to finish them off. I want to get them done and realize I spend a fair amount of time touching up anyway, so the base coats can be messy.
I actually followed my previously written plan regarding the glowy goodness this time around a bit more closely which worked out well I think. After the first session I also laid down a few base colors. I have five main groupings of models currently, yellow line skeletons, red wights/blitz-ras, my (currently white but soon to be) green throw-ras, (currently yellow) mummies, and the four tomb guardians. I guess 6 groups if you count all the coaches and stuff who I am still wondering what color to do them up as color-wise.
Lesson #1 is this: Painting gauze is like painting a sponge regardless how much glue water you daoused it with. I undercoated it and it drank watered down paint like sand in the desert. Damn. No big deal, but I had to water stuff down to conserve paint, but also use enough paint to have enough pigment to color the model! I’d say one or two full brushloads of watered down paint covered about a 1/3 of the model. Silly.
Let the light within you shine bright!
I laid down the base colors and immediately did another layer of brighter color on top of them on the skeleton party and mummies. Tomb guardians are kind of a different kettle of fish for this project for a lot of it, so they are going to get slightly different commentary.
The skeletons were straight forward as I had hoped. They are basically a highlighting obstacle course and using watered down paint sinks into the recesses and shows where the highlights are supposed to be very very clearly. Its great. After brightening them up they really started looking good.
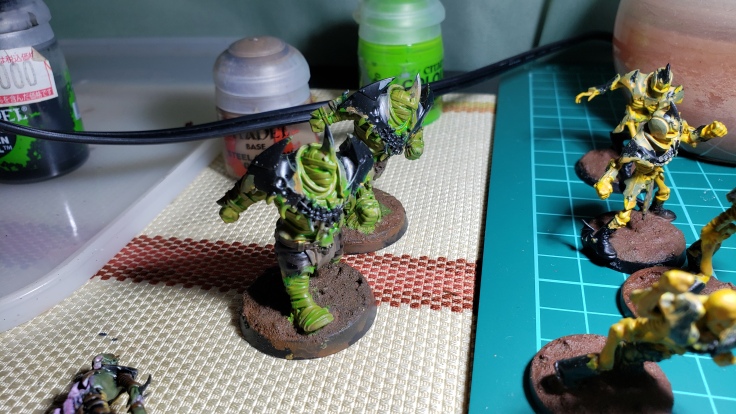
I did some of the throw-ra cloth in purple and realized they looked like a grateful dead t-shirt or something, then noticed they have literally no clothing or armor on besides their belts and loin cloths. I will paint the ceremonial cloth black and give it a nice gold trim to match team colors and potentially be where I write a number, ah that is a nightmare waiting to happen.
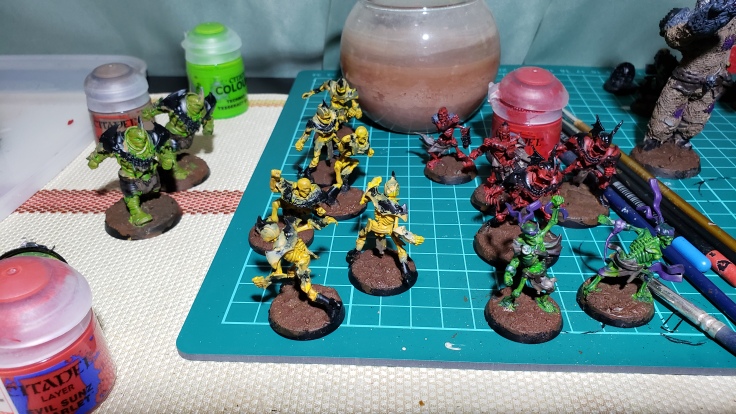
I gave the yellows a drab yellow then a brighter yellow and they were in a good spot. Gave them a yellow/ochre/brown wash to get in the recesses. Red got the same treatment and I gave them a red wash. Did green in bone color, then tesseract glowing green, and then a wash of darker green. Green and Red look the best so far.
The MUMMIES y’all! I did a drab tan color over the black undercoat and then brightened them up with another thin coat and on top of that gave a really nice watered down coverage of the tesseract glow and it seeped into the edges between the wrapping perfectly giving an amazing effect. This is exactly what I had in mind for all my models and I am glad it came through on this one so far.
Progress & Glow Highlights
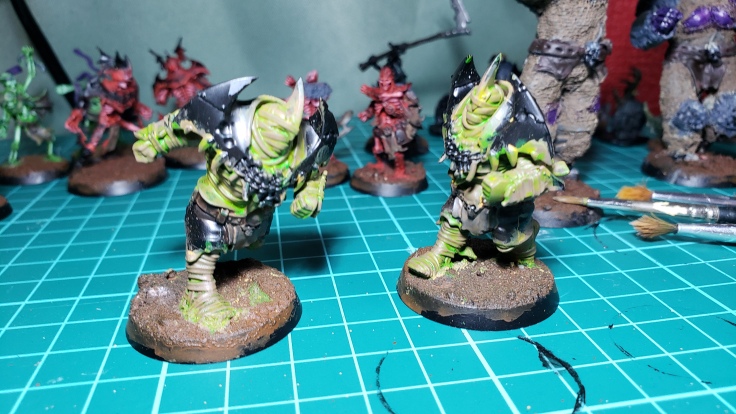
So the tomb guardians made some pretty good progress so far with just basic base coating and a little bit of TLC here and there.

I painted a drab tan over the bone color for the main mummy wrappings and it honestly looks questionable at best. I did a dark grey on the fur parts which will eventually get washed, drybrushed lighter greys and then highlighted with white as well. Taking a cue from my flesh golems I did the exposed flesh areas in purple and soaked a bit of purple wash into the bandages surrounding the exposed flesh as well for effect. Some brown for wooden bits and a coating of grey on the masks, but I think I will do them in just bone color when I finally get around to that. Got ahead of myself doing purple on the eyes and mouth for some of them, but masks and such will ultimately be touched up quite a bit since they are a focal point on the model.
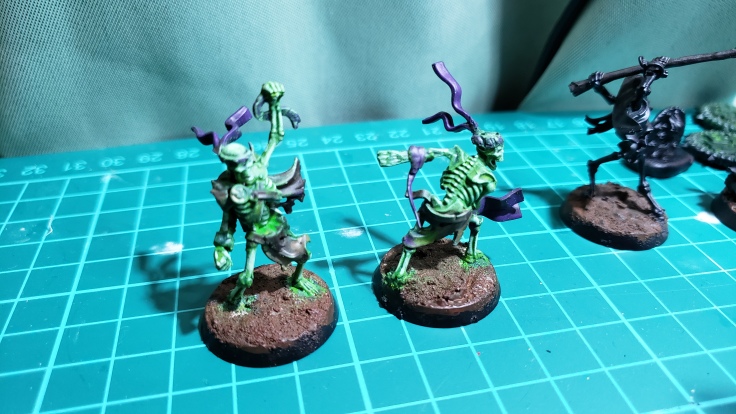
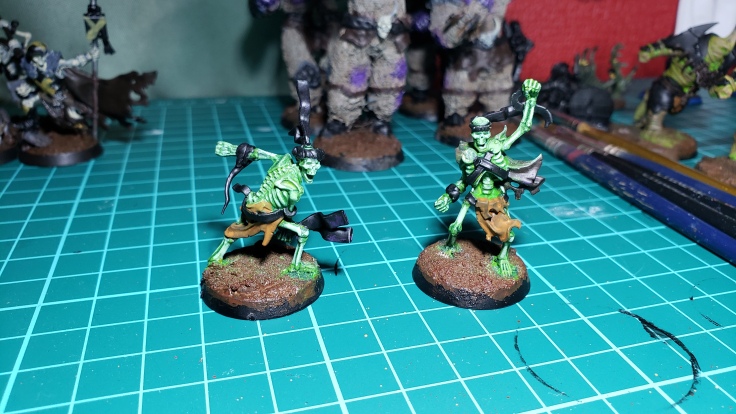
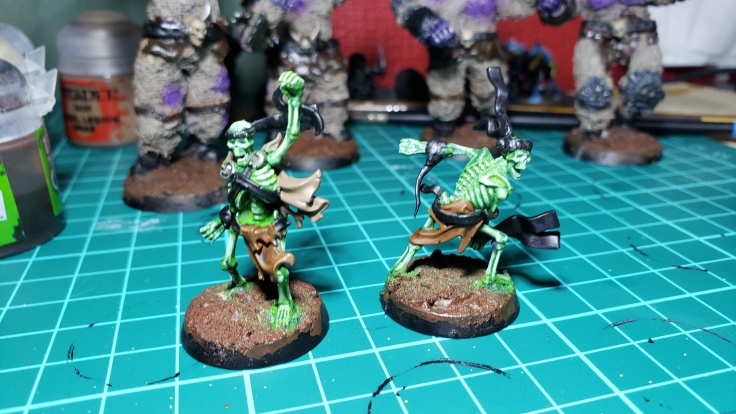
So tesseract, dark green wash, light green drybrush, and then focused highlights of a minty green/yellow mixture on each bone gave me this result. I think the bones look pretty good and I will do the eyes up a bit more and maybe do some pure white here and there, but I am happy with them and ready to jump into doing the other details. After doing up the details I will give a gentle gentle drybrush of green to sell the glow a bit more.
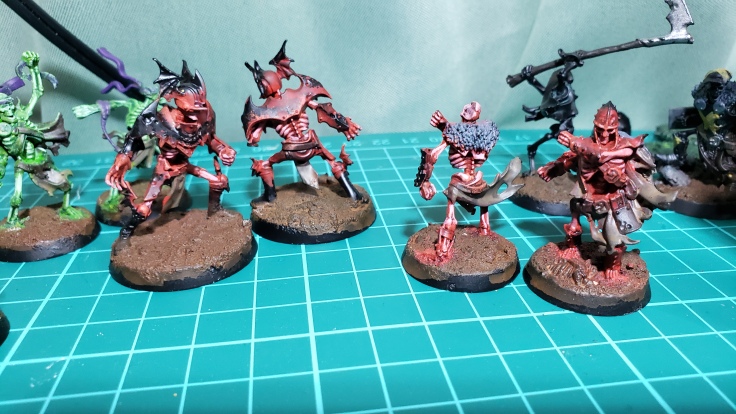
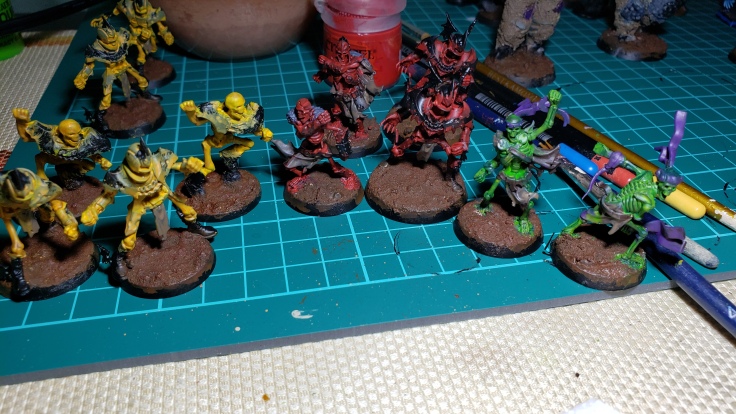
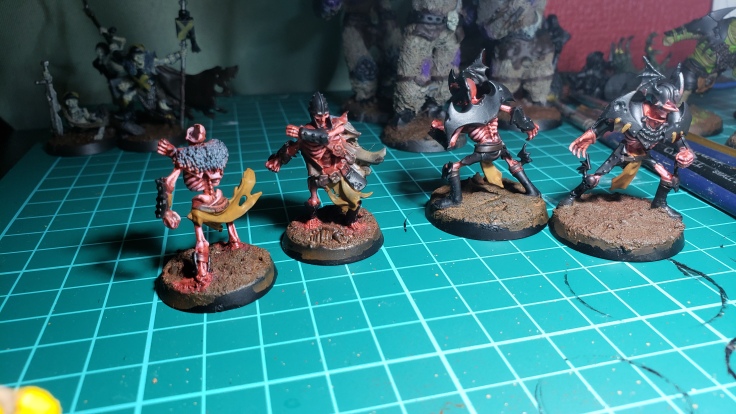
The red skeletons came out alright. With them and the green ones I fear that the white is coming off more dusty than glowy, but I am not overly worried about it. They look good enough and when the other bits around them are all painted in and they get a light drybrush of glowy emotion it will work I think. I still have to do all the yellow skeletons and their highlights, but it was passed midnight oil time when I got the bright idea to do the 6 positional skeletons, but it laid a roadmap for me to get it done and went very quickly.
After seeing how amazing the green looked before doing anything else, I decided to do one more drybrush of drab tan to make the cloth a bit more…drab…and… you know…tan. And the effect was absolutely stellar. Now it really looks like these bad boys are just wrapped up radioactive glowing monstrosities and the light cannae be held back! Touch up all the black armor, do up some accessories and such like the bone necklace, belt, etc. and they were be off to the final stages. I am scared to death to even put a serious highlight on them, but will probably do something to make those bandages pop a bit more. Probably go in with a watered down brown to give the cloth a bit more look of wear. Or like shadows and folds and such.
There are actually a few spots on the model, mostly on the knees and feet, where the cloth is actually exposing the skin and I think I just need to double down on the brightness and highlight those up when it gets to that phase. (3.15)
Update (Touched up the Black, etc 3.23)
So I got a little bit of work done since the last update and laid down the black and a few main colors. In particular, the skeletons really benefited from this and the glowing bones stand out very nicely with the black.


Almost there… (3.29 Update)
If the last update seemed a little short on commentary it’s because I didn’t write anything for it until I took these pictures today hah. I got a few more nice evenings of painting in and have pretty much got all my base colors down and have done highlighting on most of the models and their more detailed areas.


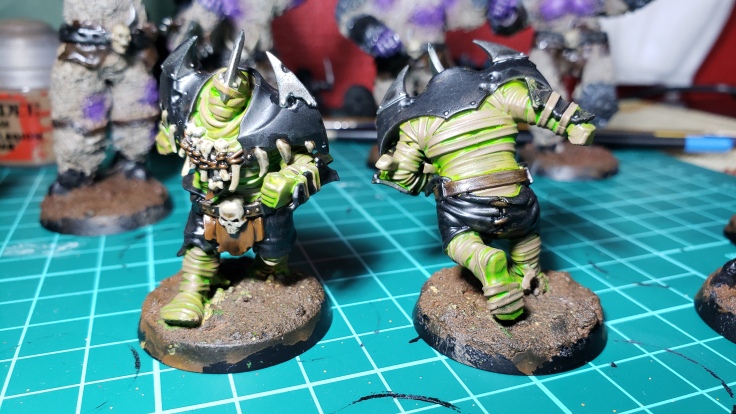
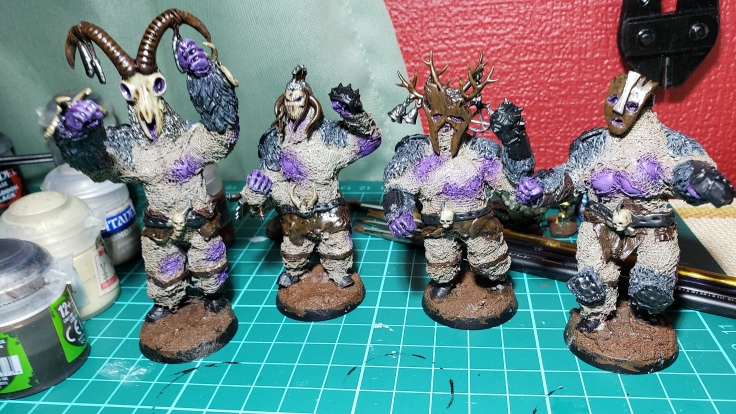
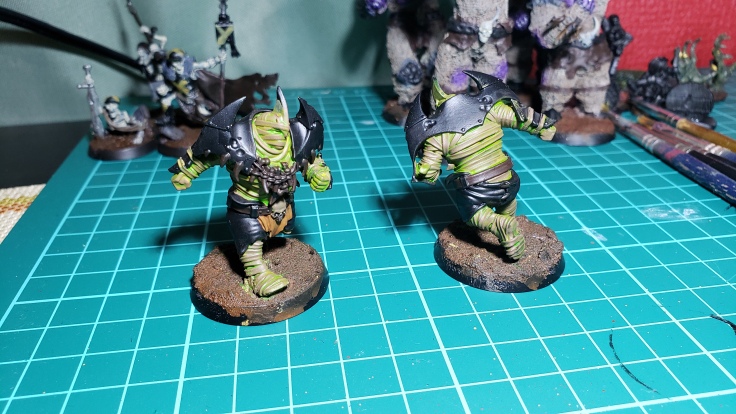
After putting some TLC into the fur and the leather and skull and wood parts, they are coming along, but I keep avoiding doing anything to the body wrappings on them. I am going to get to work on all the metallic parts and paint the gold stripes and see if something doesn’t come to mind. If not, I will just end up doing another dry brush of white on them I think. Maybe hope that the darker purple color will be enough to give them a more interesting and imposing look.
The next time I bother to take pictures of these guys the team should be pretty much done. For the sake of appealing to my brain, I will write a 7th article covering the final bits of the team, the bases, and painting up some of the staff models which I haven’t really been putting too much effort into since I am kind of saving them for the end. Like saving a hero to paint after doing a batch of infantry.
Final Stretch
First I glued down flock on the bases here and there.

I have a muddy base, and wanted patches of grass here and there with puddles as well. I glue on the flock, let it dry completely, and then soak the flock completely in glue water to seal it totally.
I drew lines along the grassy and muddy areas and they are pretty much done.
Work Complete
Take a look at the finished product. I snapped a few team pictures of the gangs together! First up, the Shambling Undead team (Name TBD)
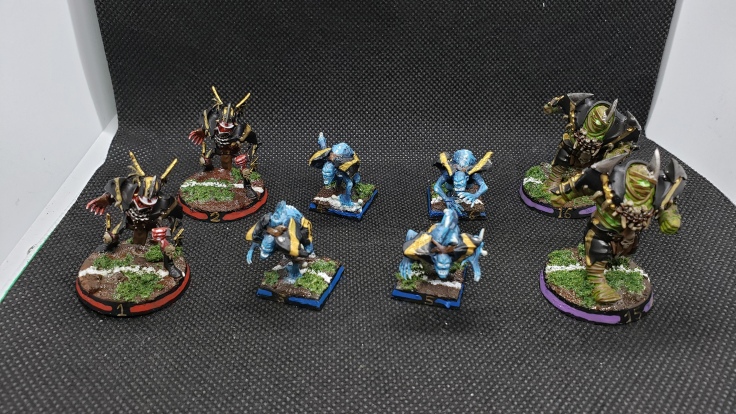
The Two wights, four ghouls, and two mummies that make up the shambling undead team in all their glory. I love the color variations and the lines on the bases to indicate their positionals. THe black and gold tie them together nicely enough and it still feels like a nice team. The glow even looks half decent.
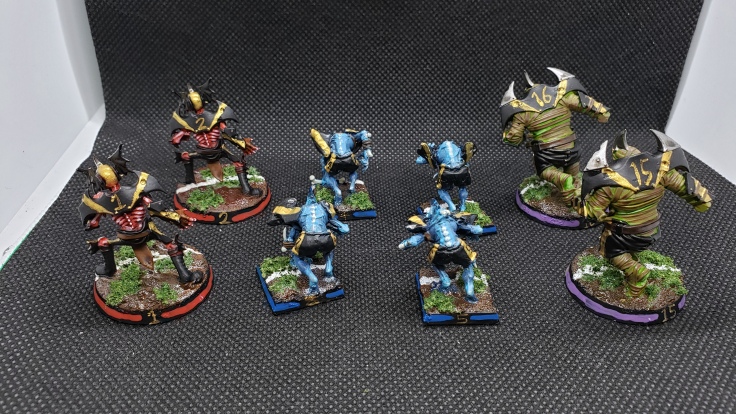
Shambling team ended up looking pretty good if I do say so myself. From the back they turned out pretty nice as well. Seeing them all lined up like a family feels good.
You’ve seen the zombies before from the Necromantic Horror team, but seeing them alongside their Skeleton brothers is nice too.
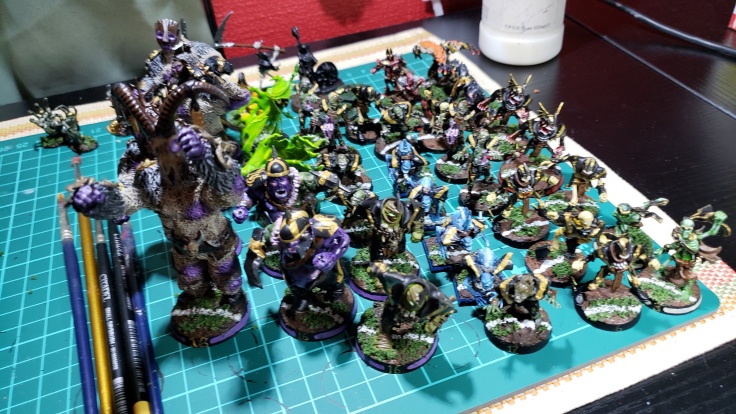
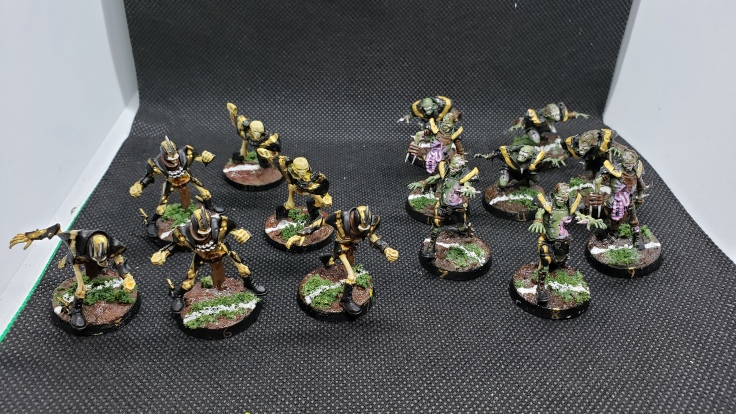
Moving on, the Khemri Tomb Kings team! Name TBD, but they are done!
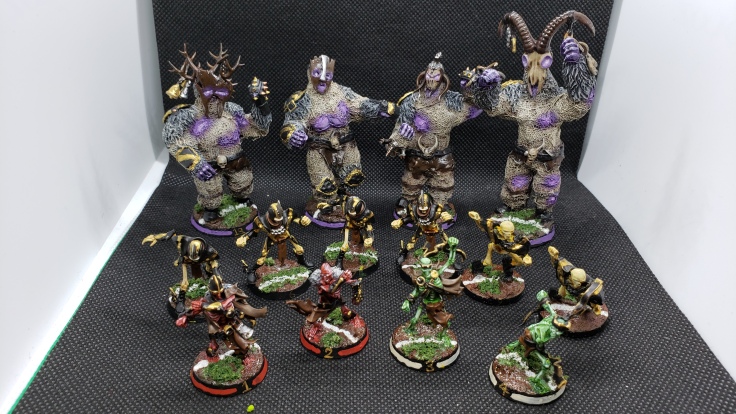
Only having 14 models does worry me to an extent, and I kind of want some more skeletons, but I can always use some zombies if the need arises. THe number work out so that can be the case too. I think the khemri positionals turned out the best. Those blitzers and throwers really have some good flavor. I am also glad I completed the tomb guardians, but I think they need something that I can’t quite put my finger on. Maybe some kind of cloth top or connecting piece between the pelt bits hanging on the shoulders. Something to add a bit more bling and to break up that huge swath of cloth. The purple glowy bits look decent, but I think there is a lot of room for improvement. Regardless, the job got done and they are playable. Not to mention one of the hugest most in depth kitbash/conversions I have done in my career as a modeler. A true accomplishment.
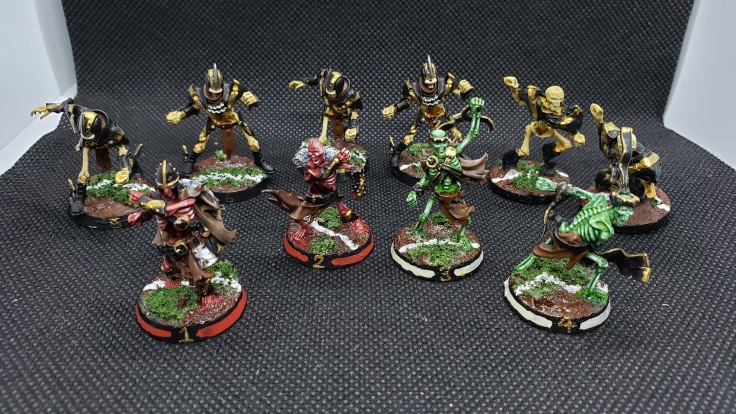
One last close up of the positionals and the skeletons. I seriously adore these blitzers and throwers. And the line skellies aren’t bad either. One of them has a spine issue (all the way on the left, #5.) and I know that his back is going to break big time sooner rather than later. Then I will need to pin it back in place. Thankfully skeleton #5 is literally the first one I will be using after positionals 1~4. Hah.
Wrapping up! (Mummy Joke.)
So this article took forever and a day to get up. I had a very very busy time between now and the beginning of writing this. Already Halfway through April currently. The latter half of this article got kind of tiresome and doing the project as well has been wearing on me. I think this is my limit for the time being on concentrating on such a big project. It’s been too long and the multi-team idea really takes a toll. There were nights where I’d look at the models, have my paints and stuff all out good to go and just watch youtube or stare at them wondering what I wanted to do. That means they are good to go for the most part I’d say.
I didn’t show it, but I put some water effects on the bases for mud and water logged grass, and also did the yellow/red bits on the underside of the bases to show prone/stunned more clearly. And I found a box to use for them and rigged it for magnetization and glued magnets on the bottom of all the bases as well. I will snap a shot later on.
I will do ONE more article and then that will be it. I like doing things in 7’s, and I still have some of the staff models and other odds and ends to get into while I still have the painting engines warmed up and ready. There is going to be a complete 180 for my two next projects. Making a pitch for a friend and then need to begin casting models for an event on the not too distant horizon. That will be good fun. Don’t know if I will show the casting bits since it might be in poor taste, but who knows. The pitch I already have a whole entire write up for my halfling pitch, but I think I will end up rewriting the whole article with the new pitch. If I do at all.
Look forward to it and take care,
tRM

Leave a comment