So, besides my other hobby interests I am actually an avid camper. That is, I aspire to be when I have the time to get out. I have been busy as of late with recent additions to the family and a pandemic dissuading a lot of trips away from home in general, although I think camping is one of the more safer activities one can do despite the viral concerns on earth. Anyway.
I have been reading a lot about bushcraft and been practicing tying knots and reorganizing my camping supplies and cutting down on needless redundancies while getting a few other various bits of gear and just doing all the ‘pre-camping’ stuff despite not having a trip planned anytime soon.
I came across the concept of waxcloth, AKA tincloth, as a way to waterproof and toughen up clothing for inclement weather in the ‘olden days’ so to speak. Mostly for tarps and stuff, but also used on jackets, pants, gloves, etc. I was intrigued by the concept and began to graduate my study from the book to youtube and imagine all the bearded fellows I found. It was a great many.
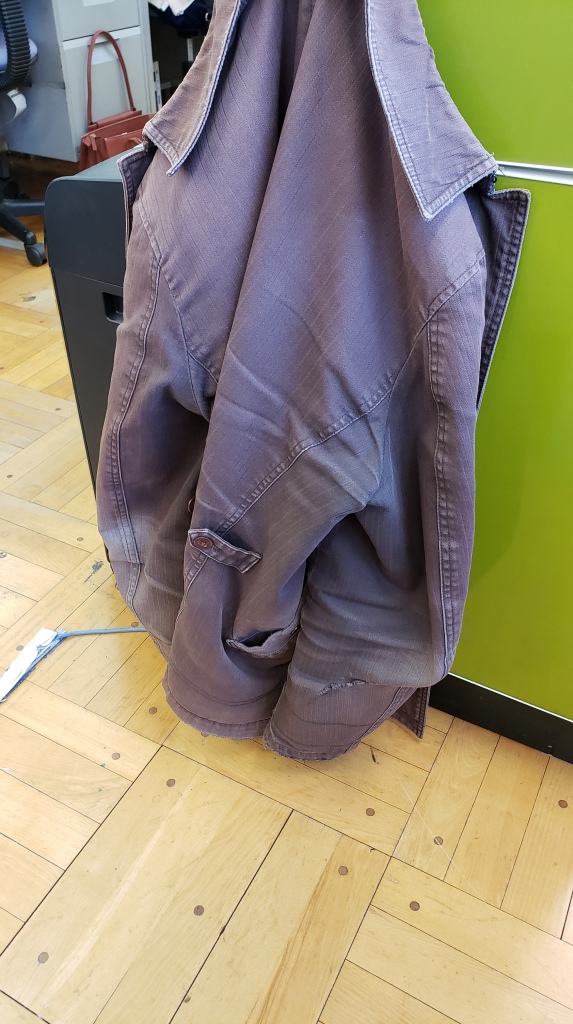
So I have an old jacket which I really like, but its beat up, torn in a bunch of places, and missing buttons too.
Ol’ trusty. I took it off only to take this photo! Its 98% cotton
I love this jacket. But since it is so old and cruddy (Although beloved) I figured that it would be a good guinea pig for this process which appears quite simple, but also might render the jacket not really wearable in certain contexts. But from what I saw online it would toughen the fabric, make it fairly waterproof, and also prevent wear and tear. I figured why not, and if it became my ‘adventure jacket’ and I couldn’t wear it in public without looking ridiculous, so be it.
Cloth wax is hella expensive.
Maybe not ALL cloth wax, but most of it is pretty pricey and you get so little for what you are paying. The internet is on its hands and knees for otter wax and they seem to have the ‘high end clothing wax’ market cornered. I wonder who tricked the rich into throwing their money at them so seriously. I don’t have the time or interest to find out. They want like 40+ dollars for a bar of wax that is only about 65 grams. I mean, they want 100 dollars for a damn wooden stick to apply the wax. They got these fools begging on hands and knees for it. I don’t have 50 bucks for a tiny bar of wax.
Of course, amazon is there in the clutch to suggest to me cheap alternatives. THe Greenland Wax by Fjall Raven appears to be the same thing generally and you only have to pay about 16 bucks for 100 grams of it. Not terrible when your alternative is selling your soul for barely a palmful of otter’s blessing. Get real.
My research continued and while greenland wax was an option, I still figured I’d need more wax that that for my jacket and while 30 bucks isn’t horrendous for 200g of specially made cloth wax built for the job, everyone online was making their own for next to nothing.
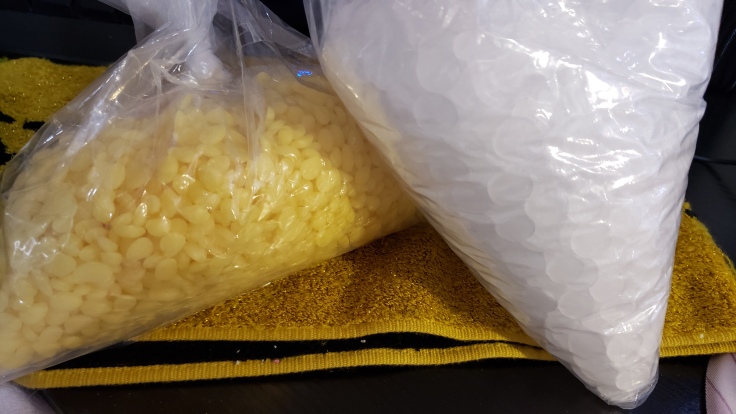
Daddy got wax.
While doing a bit of shopping with the family, we went to the hobby super center which has some of the more obscure hobbies covered, in this case candlemaking, and picked up some wax. Almost all recipes call for a 1 to 1 mix of parafin wax and beeswax. 1KG of parafin was about 6 bucks and 500 G (1/2 a KG) of beeswax was about 15 dollars. 21 bucks for 1500 G of wax. Now scroll back up and see how much otter wax is charging for 60 grams. God they really know what they are doing. Good on them, but damn I will not be fooled to that extent. Also, raw beeswax pellets smell really nice. I hope my jacket smells that nice too, but not so nice it attracts creatures to consume me.
Anyway, onto the project in earnest – making cloth wax.
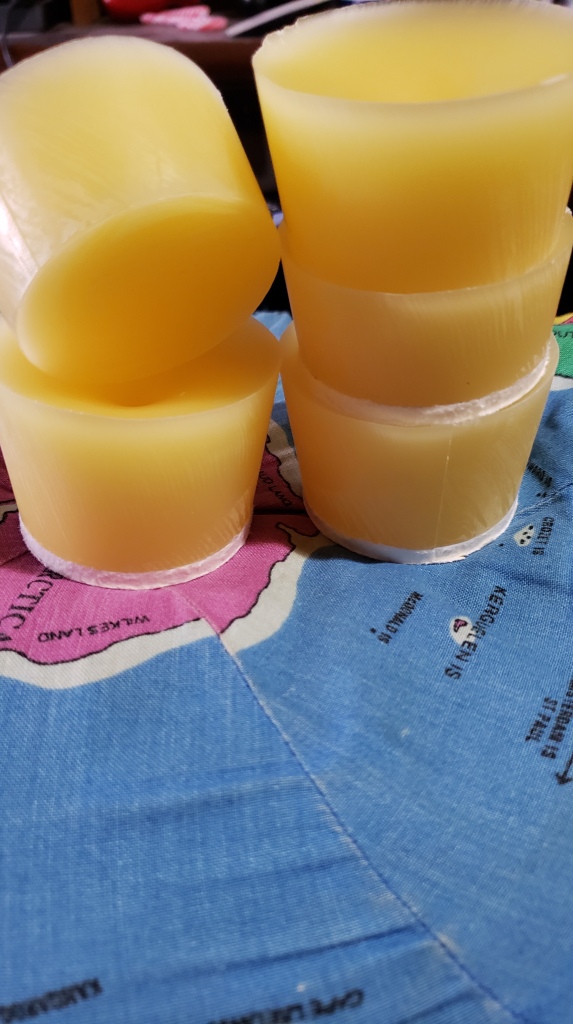
Making cloth wax pucks.
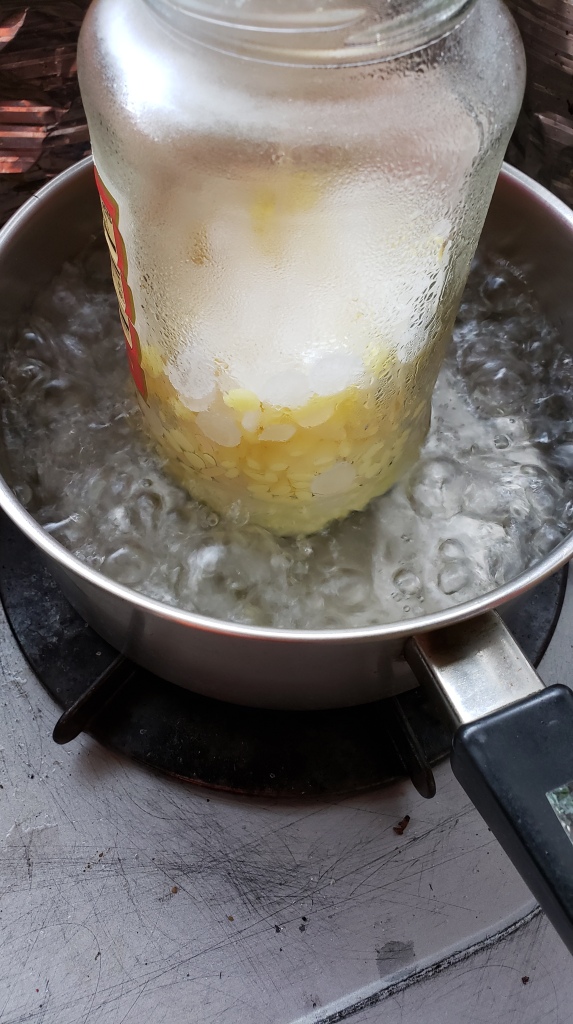
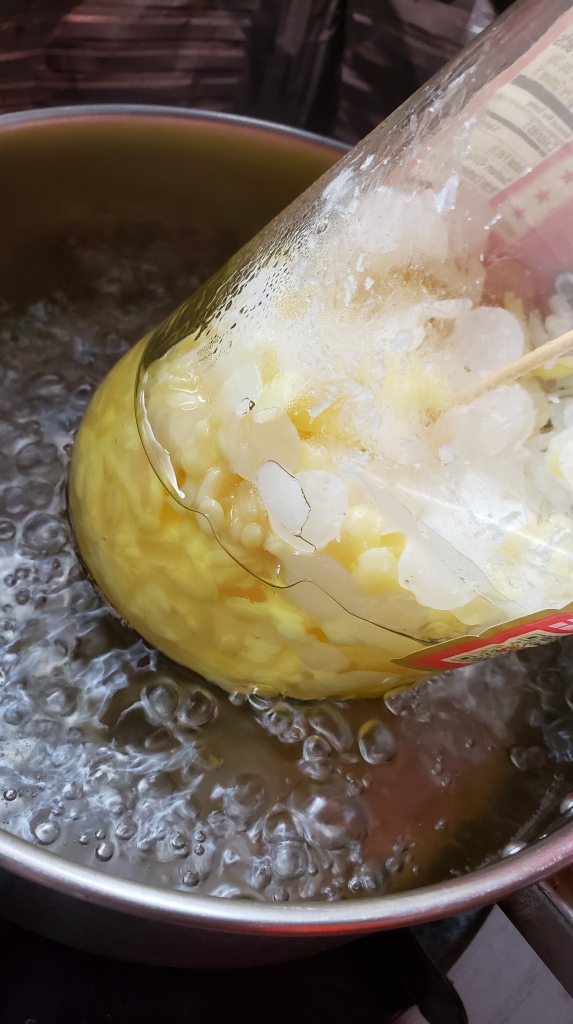
Wax in a jar!
So I didn’t want to use it all , but figured more then 100 grams would be needed so I settled on a mix of 150g of bees to 150g of parafin using an electric scale. And I put it in a spare jar I had since I didn’t want to wax up my pan since I use it for cooking and cleaning wax in great amounts of a tremendous pain in the ass. Most online dudes just melted it straight in a pot of some kind, but I wasn’t in a position to do that and improvised.
Melt that wax
So I set up my double boiler system by putting the jar in a pot of boiling water, preserving the pan for regular use and still getting the job done, albeit a little slower than I could have. It did the job no problem at all.
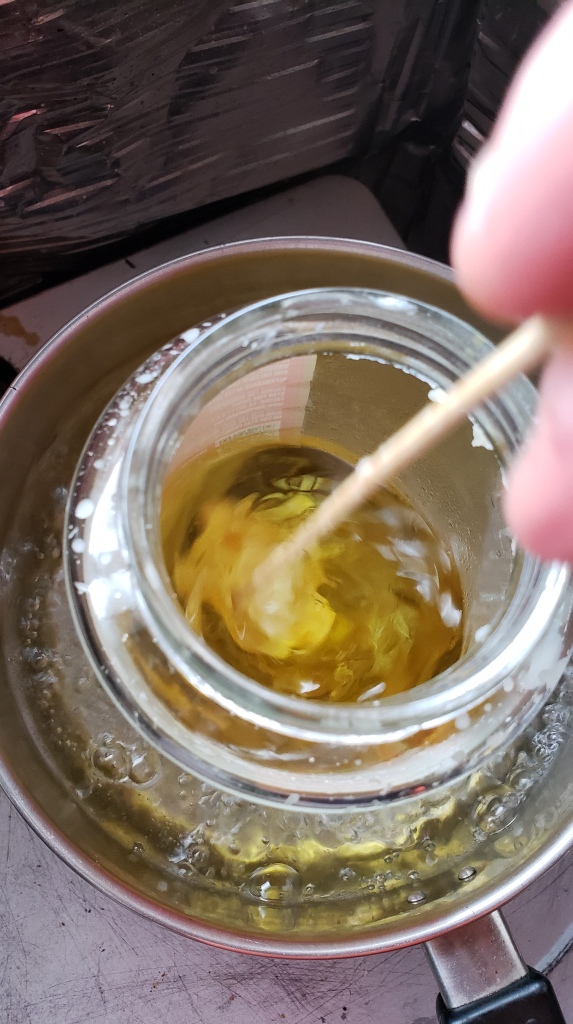
I’d say it took about 10 ~20 minutes
I used a kebab skewer to stir it, but could have used a chop stick or whatever else on hand. Just wanted to avoid using things I eat with regularly to save me clean up later.
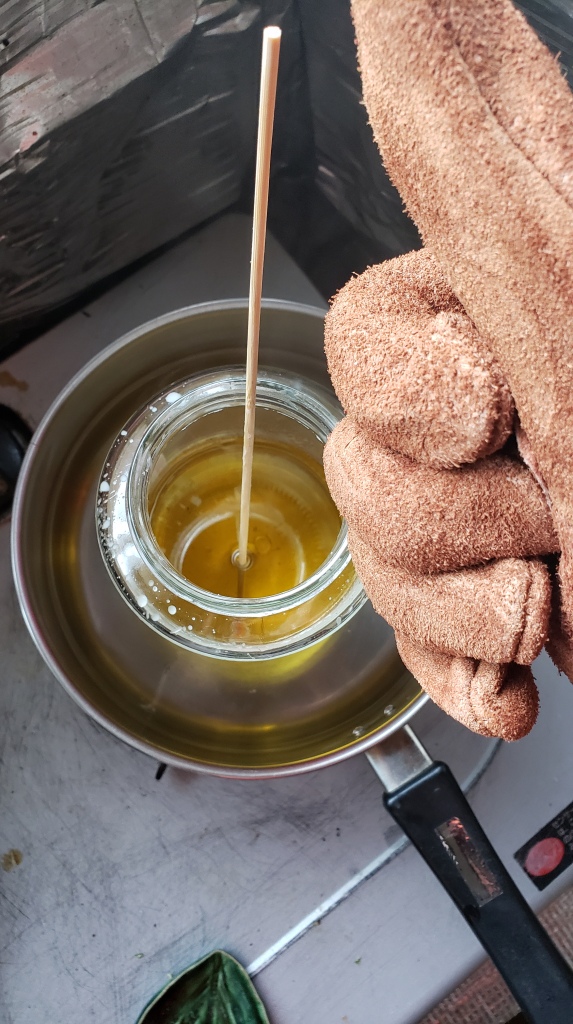
It all melted down nicely and mixed well. Smelled great too. This is also the first time that I am using my new leather gloves! I used cheap gloves when doing more heavy duty camp stuff, but it was time and as I mentioned before, I was in a ‘pre-camp’ prep fever and this was one of the purchases made. Only 5 bucks! not bad. But that way I could pour the wax from the jar with more confidence than using pot holders or a damp towel.
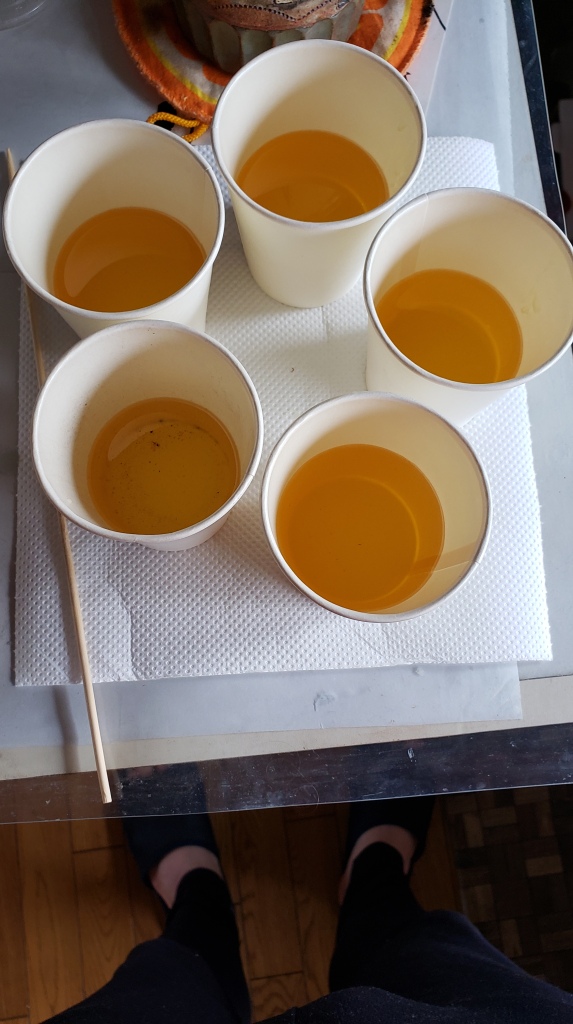
Wax in
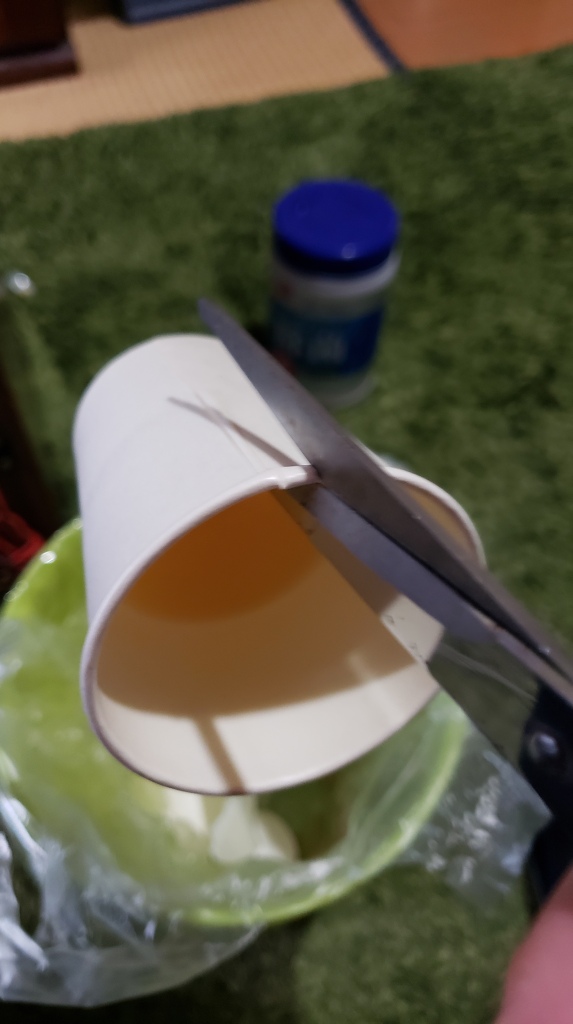
How does one make pucks of wax? Most dudes online used paper or plastic cups and I had a bunch of these little medium sized dixie cups which were perfect. I even put down a paper towel like an adult in case I spilled. I didn’t. The 300g of cloth wax ended up filled about 5 cups close to halfway which essentially makes 5 60 gram pucks for my personal use. Something that the Otter wax company would charge close to 200 dollars for, and greenland wax almost 50. Nobody is knocking them, but just pointing out the reality of what I am seeing here. I spent 20 and could make 15~20 pucks no problem and only need to get more beeswax when I run out of that. I digress. (I also am saving some serious money!)
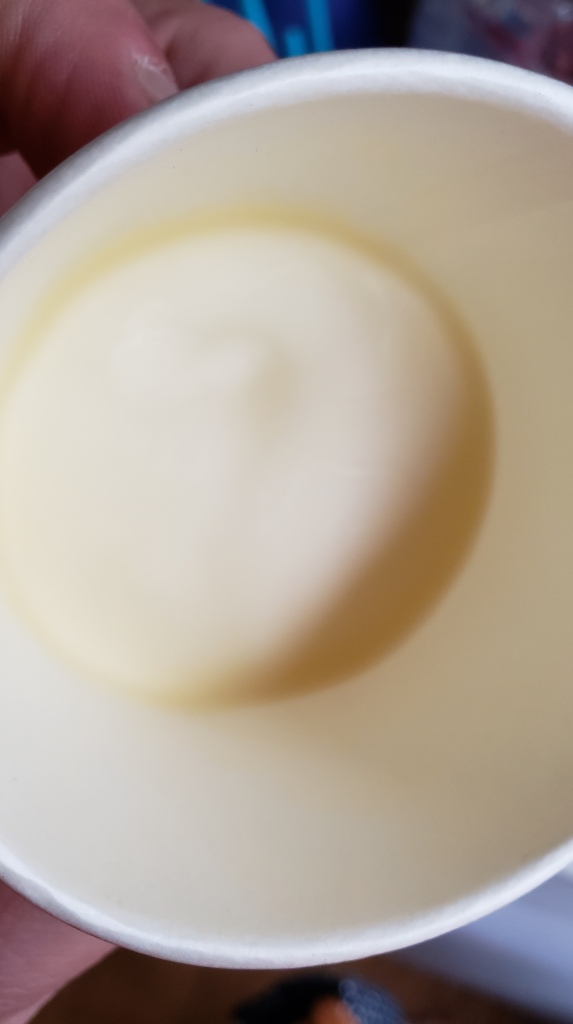
Forbidden caramel
After a little while in my cold af house they cooled off enough that they sounded hard when tapped upon. So I sat down, cut along the natural seam of the cup and then pulled it off. Besides the bottoms of the cups, they came off very easily and the shape was perfect as well. At this stage I knew that I was in luck and had a potential serious success on my hands.
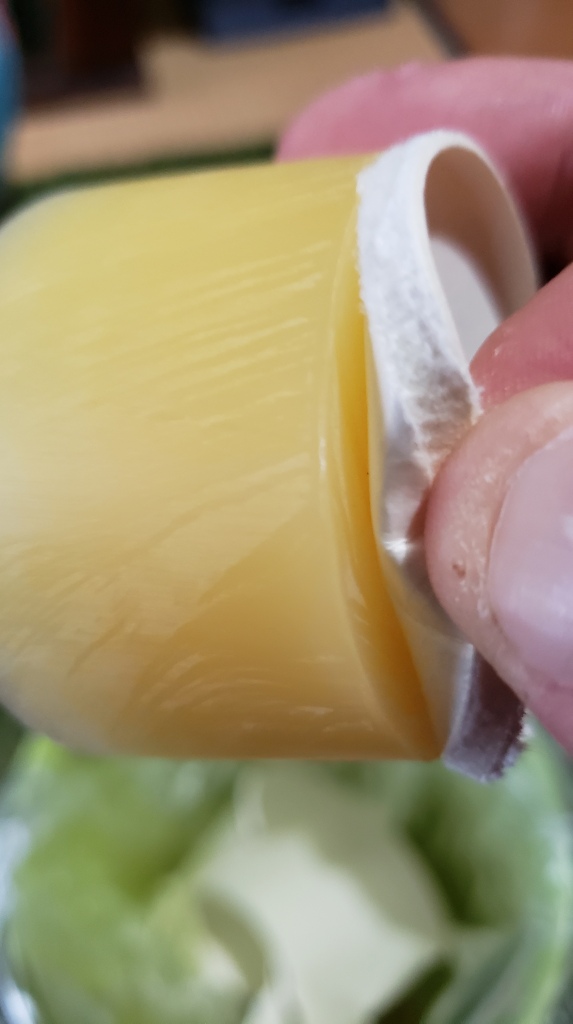
Please don’t look too long at my mangled thumbnail.
So besides the bottom bit, it came off clean. Look at how nicely it hardened and dried. I am slowly getting interested in pouring resin and this actually made me quite interested to keep up with preparing and studying for that endeavor. I had no trouble pulling the bottom part of the cup off when I took little tugs at it going in a circle and it came off easy.
*Insert Daft Punk’s around the world*
So I left a few cup bottoms on figuring it might be a nice base to hold onto or something. Maybe if I get the wax down to the bitter end having it attached to something will allow me to get those last extra grams out of it. Otherwise I will toss it back into the wax bag to melt again. Or perhaps just eat it. Yeah I ate some. Deal with it.
So the puck making process was a great success. Great value, and all in all only took about an hour not counting cooling time. I needed to be by the stove and stirring which sped that process up, but otherwise it could be done at a very very leisurely pace in my opinion.
The next phase will be waxing up the jacket, and exposing it to heat to seal it and combine the wax and cloth together to form what will become I am hoping my brand new jacket and an heirloom for times to come. I have read lots of good things and watched videos of people expressing the same as well. I am looking forward to it.
I actually managed to get a camping trip sorted out and because I am a magician with great ties to the element of fire, want to make sure that I am not using a hair dryer or press on iron or anything and that I am using proper camp fire to hopefully seal in some camp fire juices and smokey flavor into this jacket as well. That is actually in a week or two from posting this and I am very excited to see how she goes.
We shall see in the latter half of this post on making a tincloth jacket from scratch. Although the jacket is not made from scratch, I am making the wax and going through the process by scratch for the most part so don’t bother me with semantics.
Basically all any game comes down to – pretend dudes fighting each other on tables of stuff.
The Hook
I got started as many, walking around the mall or hobby shop and seeing the displays or game boards or people playing with these miniatures, rolling dice, and generally (seemingly) having a grand ol time.
There was a hobby shop or two with some wargaming tables, but back then cardboard was my weapon of choice and the plastic was still far enough away.
It wasn’t until a friend and I caught a glimpse of a GW battle bunker, dedicated to the hobby and filled with people who were all too eager to show the ropes to the next generation. I played a small sample game and thanked them and went on my way.
Later on my friend picked up the starter set, with space marines and the ancient dark eldar and we got going from there. Long story short, I made the rounds through a great number of wargames and other table top hobby since then and I write about it in great detail in the article about my personal gaming history. I have ended up playing a few skirmish games mostly, while still have my 40k army and intend on playing a few crusade matches with my friend who plays as well.
Skirmish is King
10 gangers are all you need to play in essence.
I have landed at skirmish games and think it really is the best. Particularly Blood bowl and Necromunda are my current fancy and I like them both for similar reasons.
Low model count– This is a key factor because it means that someone can get into the hobby with very little initial financial investment if that is a throttle. Also, hobby-wise, it isn’t an unreasonable amount of models to build and paint either. And for people who have been through the grinder that is 40k batch painting, it is a breeze to knock out a blood bowl team or necromunda gang or kill team or the like. Check out my Escher Gang.
Consequences and Rewards– One of the big factors that put a serious nail in the coffin of 40k for me after my friends and I started playing blood bowl, was the fact that 40k battles were, for lack of a better term, meaningless. Of course its fun and rolling the dice and testing mettle and strategic wiles is great, but win or lose, both of you put the plastic back into the box and there is no lasting impact other than the damage to someone’s psyche and the raised heart rate over losing or how the winner/loser handled themselves if it wasn’t perfectly friendly and gracious.
With Blood bowl, the idea of a player leveling up was a new concept for us (My gaming group and I) on the table top outside of D&D. Going out of your way to create opportunities on the blood bowl pitch for a player to get ONE MORE star player point so you could roll an advancement instead of making a more obvious and perhaps otherwise strategic choice gives a player more to consider when making decisions and also makes those decisions matter more as well. Ultimately one of the biggest factors in determining whether ANY game is more or less complex and in some ways good or not is how many decisions you have to make and how much your decisions matter after making them.
Meaningful Choices and lasting impact.
These are some of the charts for temporary and permanent injuries as well as examples of means of improvement in blood bowl and necromunda
The above charts are some of my favorites to look at. (Yikes, I should just go back and play old editions of D&D with that attitude! – I have, and loved it.) Yeah, seeing charts with a little bit of random, but also some control as well is a nice balance for me and it makes improvement and advancement exciting, a little random but also more natural as well. Being in 100% control of ALL advancement has its place and makes for more control (And to some players more “fair”), but it can take away from the narrative at times and also take away from the agency of the fighters and models themselves. (Have I just assigned personal agency to the plastic models on the table? Yes I have. The dice speak for them and through them, this I know.)
When games have lasting impact both positive and negative, besides stats and injuries and improvement in game, also memories remain as well. I remember who caused a permanent injury to one of my star players in blood bowl and would go out of my way to put more blockers than necessary on them in order to return the favor when we played again. When a particularly lucky/deadly ganger of mine goes on a small rampage sending my enemies out of action, I have more then half a mind to play them a bit more conservative in case revenge is waiting for them around the corner.
The excitement and stakes rise dramatically as characters in game start to get stronger, have a higher value, and become more important to the team/gang. Also the fear lurking in the back of your mind and the anxiety that goes with it that at any moment all that could be taken away with careless play or a lucky dice roll… Those are the reasons that make these games so fun as a player.
That green fella is going to have to roll on no less than two charts to sort that out. Talk about IMPACT!
Expanding and Enhancing the Team/Gang/League
Now this is a gang firing on all cylinders. So much equipment and so many members…
Not just the players get stronger, but the teams/gangs/etc. get stronger as well. Often times there is an opportunity to hire on valuable support staff, purchase new equipment and weapons, and plenty more.
This is one of the coolest parts of skirmish games and Necromunda in particular just unleashes the floodgates of customization when you introduce the trading post into a campaign. It also allows gangs who don’t start with certain weapons or types of weapons to dip their toes into those waters, or to purchase armor, eq, and shielding to overcome many of those troubles. Blood bowl has cheer leaders, asst. coaches, apothecaries and any number of mercenary and star players which are similar in that respect.
This ability to tailor your team to exploit weakness in opponents and capitalize on strengths while minimizing your blind spots adds a nice level of customization that a lot of games don’t afford to players because the factions and their options are set. If you want to enjoy luxuries in those games you need to play the factions with those luxuries, as in you need to buy the plastic for those factions, etc. etc. all they want is our money, etc. Either way, the ability to customize, grow, and expand your team and gang is another way to have an impact on the game and also a way to recover from consequences as well.
The Narrative (And sidebar on Focusing on the Game and not the players.)
Impact and consequences lead to emergent elements of great narrative import, which is to say that a story unfolds as you play just because some crafty play and a few lucky dice end up leaving ‘lasting memories’ and now you form rivalries. Or if players in blood bowl score every game, they become undoubted champions of the league.
The narrative element of tabletop war gaming is indispensable. If you don’t have some kind of underlying story element, over arching campaign, or even any kind of interest in the game outside of its mechanics I think so much potential is lost. I don’t think people need to write pages and pages of fluff to justify the game, but playing skirmish games and not even naming your dudes is such a heart breaker to me. I’d sooner forgive unpainted minis with all proxy weapons (The first handful of times) before letting someone slide by without at least naming their gang/blood bowl team.
There is such a low bar for starting narration in any skirmish game and it immediately makes things so much more interesting. For example, instead of ‘Cultist 4 KO’s Ganger 2’ you can create something more memorable like ‘Slither tongue the cultist KO’s Rude Wanda the ganger with his blunderbuss’. It isn’t that much of a change, but now we add names, a little bit more flavor, and most likely a few more memories to Rude Wanda and Slither Tongue. If the lasting injuries on Wanda end up being particularly serious now we have a name to set to the figure who dealt the blow.
Side bar regarding this topic. (This ends up roller-coastering off the rails a bit so hang in there.)
I previously mentioned that all you were left with after a 40k game is a the feeling of psychological damage even in the best of situations. That is because (in mostly matched play) 40k is more of a battle between two players using the pieces as their method of mastering another person. You get the same in any war game to some extent, but the larger scale wargames turn into a wager of percentages and minimizing the random factor while maximizing what is possible within the extent of the rules.
Few if any people I know bother naming their armies, let alone each squad and only giving a name to their characters on occasion. I think this is important because when you are thinking more on the level of ‘Rude Wanda and Slither Tongue the Cultist’ you are thinking less about ‘Me and my opponent’. It is partly an immersion thing (Into the story and setting of the game) and also a means to ‘blame’ ‘lucky dice’ or ‘strong play’ on the models and the dice instead of cursing your opponent, another human being across from you.
Players are going to do their best in games typically and in the world of war gaming, people get mad when they lose or the dice suck for them or their opponent rolls uncharacteristically well. I knew I was getting tired of 40k when my opponents would comment on dice rolls in terms of statistical commentary instead of something like ‘Oh that is a good roll!’. “Hmm, 5 hits, that is a little under average for the 13 hit dice I rolled” with a furrowed brow indicating out loud that ‘this was contrary to expectations and the laws of statistics and if the game of numbers in their head (which they already won) doesn’t play out to the averages (Which they are planning for and deserve) that the game can be considered a throw away because ‘dice’. It can be treated that way statistical mind or not, but all I am saying is if that is how you are looking at the dice, go take a competitive math test or something because that is weak… BUT! I am digressing from my digression.
What I mean to say is by having named models and attributing luck, good play, cruel actions, etc. to the figures. and their predilections (Even though we ALL know that the players are controlling the plastic little toys) it is easier to separate what is happening in the game world from the real world. Nobody wants to be mad at their friend because they got their butt whooped in a game of pretend with rules. If we can ‘blame’ (I use the term blame here because there are emotions and feelings which must be directed somewhere) the models and figures and their personas in game instead of our friends, the whole gaming process goes much more smoothly in total from my experience and becomes something that we want to keep playing.
For me and my friends, on top of the time investment, plastic investment, and need for lots of space, terrain, tools, etc. the result would often end up with someone disappointed at how their models performed and are they blaming themselves? The other person? Luck of the dice? It changes every match, but the person who loses (or even wins in many cases) in games like those has a lot of unresolved feelings in many cases where their opponent didn’t have as good a time as them or vice versa. Gracious and friendly players aside (The exception rather than the rule), this is often the case.
If you know this fella, this is what happens when the cycle of anger and sadness falls into the hands of narrative creators. This marine isn’t angry about anything in-setting though, no sir. They are angry at themself.
The Models ‘have agency’ and they ‘make choices’ which keeps the cross hairs of rage off of our loved ones.
To summarize some of the narrative ideas I have talked about so far (And make a brazen attempt to keep this train on the tracks) would be: Naming gangs/players brings the game to life. Mechanics/decisions that have great Impact & Consequences help to create strong memories and begin to show emergent story elements like rivalries, fears, anxieties, and hopes. Expanding & Enhancing the team allows a player to grow and strengthen in a custom direction as well as mitigate consequences and weaknesses (often at a cost). By having this narrative Focus on the Game and not the Players we can keep (the sometimes) stronger negative emotions focused on the plastic and not the people, which can ultimately (In best case scenarios) fuel in-game motivation to settle the score instead of leaving nerds (Of which I am one!) with a cluster of unwieldy psychological emotions that they can’t readily deal with (Which I have in no short amount. You should know that if you have read this far!).
Giving the models ‘agency’ (Which is to say letting the dice have a say in things once and a while) adds a fair amount to the whole experience in a few ways. I listen to a few podcasts and one group plays blood bowl in a league where ALL skills are almost completely randomly chosen. (Choose a skill set, then pick 6 of the available skills and roll off for which one you get) Otherwise people all just pick the “best” skills every time and you see a lot of repeat gameplay, and then start counting dice odds since that becomes the only choice you have in the hobby since the ‘meta’ has determined the ‘right’ choices to make…
When games have mechanics to partially randomize leveling up and in particular how skills are gained, it makes characters become unique instantly. Even if the skill isn’t the ‘best’ choice, it is a new tool available and with that tool in (proverbial) hand, you start to look at ways to solve problems or take advantage of that. This creates emergent strategy and game play. Normally a character can’t climb well, but after rolling a skill up and getting a skill removing all penalties from climbing, now you are thinking about the terrain and play area with a brand new set of eyes. This is one of the best aspects of random skill ups.
Even if the skill up is less than ideal, or nearly useless even when putting them into situations to put their new skills to use, at the very least you have a new lease on life through them and they can now perform very risky gambits and gamble their lives more often. Why? Because they need to die, and I need to rehire a new champion who has a half decent skill! As a (sinister, but efficient) blood bowl halfling coach once said, “Halflings who level up get placed on the line of scrimmage and things work themselves out soon enough.” This maxim being funny because halfling teams lean heavily on keeping team value low, and skilling up even once almost doubles their value, so they are placed DIRECTLY in the way of danger until they ‘retire’ the big permanent ‘retirement’ so to speak. This concept can apply to other games as well if the ‘fun and random’ skill ups get a bit too fun and random for all but the true narrative players who subsist on IV drips of pure immersion to get by. I don’t blame them. I like winning and playing a hard game, and I also like random interesting skills and abilities on characters with narrative and story undertones, but if your physically weak fighter with the sniper rifle gets skills which provoke enemies to attack them and gain bonuses to morale checks or something, then something might need to be done there.
Losers Win
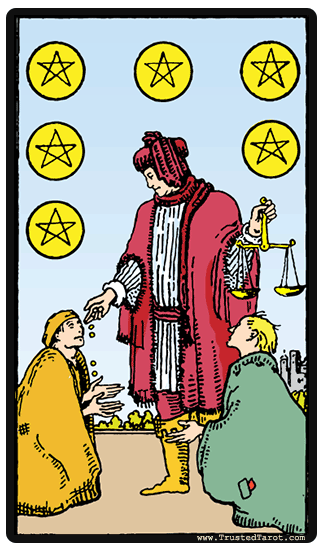
Neither of you is the dude with the scales. Those are the dice offering scant justice between each player. You get very little, even when you think you have won.
Maybe not in the case above with the terrible skill ups, but one of the most important parts of why skirmish games that I am describing above are great are for the plain and simple reason that losers win. As in nobody loses, completely, more often than not.
How can this be? Typically these games offer rewards, bonuses, and advantages to teams who are in a weaker position by a large margin and even when they lose, everyone gets some kind of reward.
Munda offers bonus tactics cards (One shot ‘gotcha’ style abilities to gain an edge) per 100 credits of difference between the two gang’s ratings. Even more power cards for every 200 cr of difference. I suppose this represents the desperate tactics and moves that a gang feels they need to go through when they are so out matched and against it. Blood bowl offers the inducement system essentially giving the ‘underdog’ an equivalent amount of spending money to bring the two team values into equilibrium to use how they wish before the match. In both cases, teams which are clearly at a disadvantage get a little bit of a boost to keep them in the fight, or at the very least, give them more of a chance to stab back before they are ultimately pummeled.
In regards to post loss, and thanks to the XP systems and scaling objectives or winnings, even the losing team gains something from the loss. The few places things went right earn their players XP, potentially skilling them up to bring the pain to bear in the future. Otherwise, most missions offer an amount of credits, reputation, experience for participation even if you have lost. Every fighter in a mission in necromunda gains an xp for going on the mission. Every Blood bowl team gains a minimum of 10k gold pieces at the end of the match.
It may not be much, but instead of walking away from the table with nothing to show for it, maybe a few fun memories of the battle perhaps, Each player’s team/gang gains an amount of experience, reward, and some form of progress one way or another. Losses are still steps forward, although they are smaller compared to if they had won, they are still steps forward. In the previous example, maybe, MAYBE if you and people like you all lose enough then the people who write the rules of the game will throw you a points reduction or perhaps finally nerf the ‘broken’ offending models.
This is huge, and is one of the main factors that prevents feel bads from poisoning what was supposed to be a good time with a like minded hobby enthusiast. Even though winners obviously win and gain the most, losers are not just left broken and beaten. They get a little something for their trouble, and may have left a few marks on their enemy as well sending key warriors/players into the recovery box giving them a better shot next time.
The Future and the Crusade
It is almost a war of religious proportions, and a fight over a ‘bible’ of sorts…
The new edition of 40k (‘#new40k, 9th edition, 8.5, what have you) is on the horizon and when I saw the previews I got excited! Believe it or not, despite how much I rag on 40k, I still enjoy it very much. It is a time sink and a slog and players I can stomach playing have gotten fewer and fewer around me so opportunities have grown fewer as well, but I still enjoy the game. And I also love to read rule books and see how things are changing since I had mentally checked out of 8th when the rules for my dudes were split across so many books and I didn’t have the will to hunt them all down, matome them, and print out my own ‘codex supplement’ to make them easy to access. So I am excited by all the news. And in particular the idea behind the ‘crusade’ system.
GW seems to have gotten the memo and realizes that there are people out there who want something more than matched play and refuse to participate in the main group events because matched play draws out some of the worst of the fanbase and you only need to play against rules lawyers and people who play to win at all costs a few times to have a bad taste in your mouth and not feel the desire to give them another chance. That is kind of my situation. I have looked over the old ‘narrative’ ‘campaign’ rules stuff that they had for the last few editions, but it never seemed fleshed out and always shunted in as a pittance.
Any form of narrative campaign offering thus far.
Crusade looks good. Starting with smaller patrol-sized armies and limited choices for unit composition, then earning resources to gain more units, more choices, and hopefully have more fun. The requisition point system which seems to be in place to ‘buy’ units each battle, and to spend on unit upgrades seems excellent.
Treating each unit like one would treat a single ganger or player in munda and blood bowl is a great way to do it. They gain scars, weakening them after particularly bad losses and gain accolades and abilities for their accomplishments and success on the field of battle.
I only saw what GW has been sharing on their community site and stole a ‘tiny’ glance at the leaks, but I like what I am seeing and my friend and I are looking forward to getting a few games in and try out the new crusade system.
A lot of what is being implemented falls right in line with a lot of the things that I think is good in tabletop and wargaming. That is a very encouraging thought! I appreciate the ability to choose and ‘control’ the game, but I also like the randomness of the dice. I like the concept and implications of luck, both good and bad for a number of reasons you can listen to my podcast to hear about. The ability to control the game in certain aspects is the same as making choices in those games. The choices we make in games shape the direction and also reflect on us as players, our skills, and ability to read and react to situations. But having dice decide the fate of fighters and characters in game as well as how they grow and suffer, that is the exciting part which is another fun and interesting surprise that needs to be considered when making further decisions, and also an impetus that helps to guide the narrative as players attempt to make sense of why such things would even be possible.
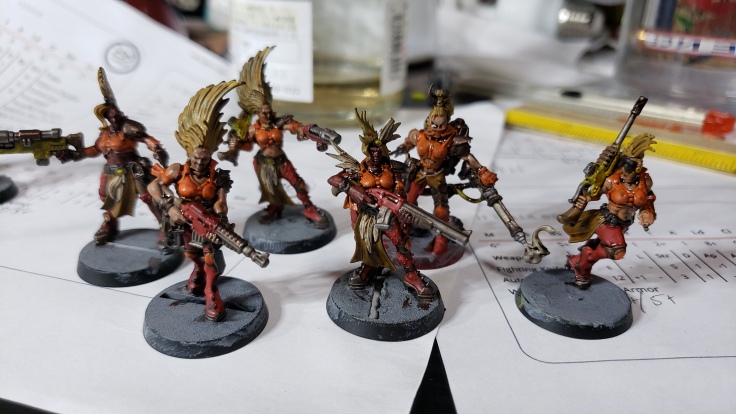
I have been making pretty good progress on the girls the last week or two. After priming them I already began laying down some base colors and will end this article with washing them. (*Spoilers* Agrax Earthshade and Nuln Oil are essentially deities in my life these days and gave me hope for this project to not end in failure and disappoinment.)
So after doing some fun kitbashing and getting the girls in decent shape, it was time to bring some life to the models. I knew that I wanted Orange to be the main color for them. I LOVE the yellow that GW did and think that the amount of yellow in the Escher default color scheme is amazing. I like the wild and crazy hair they all have and the whole attitude that Escher seems to embody as a gang. I also like women very much. I also like super sexy women too. I actually don’t mind at all if they have electrified whips or shoot poison needles and boiling plasma or fire shotguns filled with acid either. (Can you see why I love dark Eldar/drukhari so much?) Also, Escher are agile, have insane initiative meaning movement and board traversal almost goes without saying.
Reading over the gangs as I was gearing to get into munda, I knew they were the gang for me in both aesthetic and playstyle.
Color Scheming
Much of the first layer is on at this stage. These are my champions and my leader.
So as I was saying I wanted Orange to be the main color. I also saw they are all wearing these epic thigh high boots which, while a bit sexist as almost all GW female minis are, were super sexy and I loved them and saw them as bright red leather. To keep with the theme of orange, I planned on highlighting them up to a bright red which essentially borders on orange anyway so it should mesh well enough and the bright reds would be a great contrast to the dirty nasty gritty bases I plan on giving them too.
I have a terrible habit of going CRAZY with metallics and all of my models end up covered in a smorgasborg of gun metal, silver, bronze, and golds. I can’t seem to help it and I want to have less of that this time around because these are supposed to be grungy underhive gangers, not some fancy precious metal toting parade or something. So I was sparing where possible and only used the grungy colors.
Behold one of the best metallic paints of all time from GW
I love tin bitz. It is like pre-dirtied-up bronze that can be dry brushed with a light gold and look so nasty and grungy and shiny at the same time its excellent.
That and a little gunmetal here and there, primarily on the guns. In the images
My precious Juves & Juves to be.
You can see at the stage above I left off color in a few key spots. Those are the places I intend on painting dark grey and black leather or metallics. I thought the warmer color of tin bitz would match well with the oranges and reds I wanted to be main on them. I also put down some tan/raw leather colors where I want to paint tin bitz to remind me later on, or where on the hanging cloth which I want to try and do up in animal print.
All kinds of flavors in the Neon Urge (My Escher Gang)
So besides the clothing and such, Of course the skin and hair as well. I have a color coding system for the hair, Green for Juves (Since they are ‘green’ so to speak), Blonde for the gangers (I am going to do some highlights and wayward strands of various colors to give a little personality and also show that they are becoming unique in their own right), and the leader and two champs in Purple, red, and blue respectively. My close combat red hot wild champ has red hair and my more cool needle rifle assassin has the blue hair. Leader has purple blending a bit of both.
Also, each of my leadership has a different flesh tone as well. This is actually kind of a blind spot in my painting skill set, but painting “natural” fleshtones is actually quite tricky for me. I have painted TONS of red fleshed aliens and khornate daemons and such, I have painted the deathly pale whitish-blue and whitish-purple flesh of vampires and dark elves, but when it comes to natural browns, reds, tans, and paler flesh tones I am a bit of a mess. So this project is going to have a variety of flesh tones as well. I want to take some into more darker browns and others into more reddish orange tones. I have a few which I plan to have paler flesh, but with different undercoats with mixes of yellows to give some variety. Besides the application in being able to practice painting different styles, I also get a much more varied background in my gang which will add tons more personality I think.
A couple more shots with some of the tin bitz laid down, but many more details ignored at this stage.
What time is it? Time to get a wash!
Juves looking tasty after a little wash.
I will let that joke wash over you for a bit while you debate closing the browser tab.
So I finally got to the stage I look forward to as soon as I am getting tired of going over the details – applying a wash. I used GW’s agrax earthshade, AKA brown wash on the whole model. I go pretty heavy on the wash in the early stages of the model as a means to show myself where I need to highlight the model. Also, the underhive is gross and smelly and filled with pollution and the grime of tens of thousands of years so going heavy on agrax felt more than acceptable. Finally, because I had primed over an old paint job, I needed the wash to draw attention to the parts on the model which weren’t as detailed as they were since I turned them into melty girls.
Thank goodness, because after the wash there was still a healthy amount of detail remaining. The faces are pretty much done for I think so I will need to get creative there, but most details were still quite discernible and some of the poorly glued connections actually are hidden well enough since they have been shaded.
Look at me all fancy busting out a paper towel all professional-like for this photo.
They are still wet with shade at this point, But the amount of intact detail was nice. The tin bitz (Most notably on the boots, kneepads, and whatever those side packs on their belts are. They look a bit like chinese lanterns and some kind of walky talky or something. I am presuming they are for communication, like mini-vox casters or some kind of support system. It is easy to forget that although this is the far future and a LOT of the necromunda brand has flavors of cyberpunk, it also has a lot of flavors of post apocalyptic as well so while they can get bionic implants and stuff, we aren’t talking about badass altered carbon-level neurocham stuff or like microchip HUDs in an eye ball, we are talking more like “somehow we managed to pray hard enough to the machine spirit to get approval after duct taping freshly gored eyeball connector bits to some fiberglass wiring and a go-pro then popped a 9 volt battery in there good luck killing Goliaths buddy”
Which is a long roundabout way of saying it probably is a walky talky, but makes me want to know what it was intended to be. a few minutes of light googling has failed me so far so if you know let me know.
Further research found this very clear picture of the bit in question.
Apparently I can’t drop this and googled another 10 more minutes. It appears that all the models I have have these, but they aren’t the only accesories that Escher get. They aren’t grenades, knives, and I think they are more than trinkets. I am ammending my guess from vox caster, to vox caster or perhaps the paired bit to a respirator or similar life support apparatus given the tank-like container which runs through what looks like some kind of portable analog panel/display showing pressure, quality, etc perhaps. Anyway. Lore behind obscure accessory bits aside, where was I?
One of the better shots post-wash.
Here are the gangers. Washing realy does them good and enriches the skin tone on all of them. The shotguns and autoguns in particular look super nice and dirty. When I get them with nuln oil later on they will be in great shape. I still have plenty of stomache and arm definition which will be great for highlighting. The red boots really look like leather as well after the wash. Not to mention the orange details which looked like ruined macaroni previously now really pop and look like garments. I really appreciate these models since the wash settles exactly where it needs to with only a little bit of encouragement from my brush. I particularly like the pairing of tin bitz and red on the boots. I was happy with that choice after giving them a wash.
Where do we go from here?
Next steps… yeah I need to base my minis. As I was painting them I realized slowly that I still needed to put some basing goodness on them so that is in the cards. I figured I am going to do the shoes and legs up a bit more so even if I base them know and undercoat the base I will be in good shape and not ruin the model too badly if I get messy.
Highlights. I don’t think I am going to go TOO crazy with them since I have ten more of the girls waiting in the wings to be built and painted from scratch… So I want to brighten up all the reds, oranges, flesh tones, and do some golds and silvers on the tin bits and gun metal here and there.
Details. I plan on having fun with hazard stripes here and there, particularly on my leader’s chain sword. I also need to figure out how to paint animal print and make those cloths look a bit less like dish rags and more like tiger and cheetah furs. Need to bring the hair to life and add a bit more flair to give them some more personality. Also going to give some more love to the weapons, maybe do some weathering here and there. Finally small details like the feathers and gems here and there around the models will get some love too. Blood for the blood god is perfect for making ruby-like red gems which sparkle. I love that paint so much its obscene.
Future is looking bright for the Neon Urge! Thanks for reading and please tell me what you think that bit is!
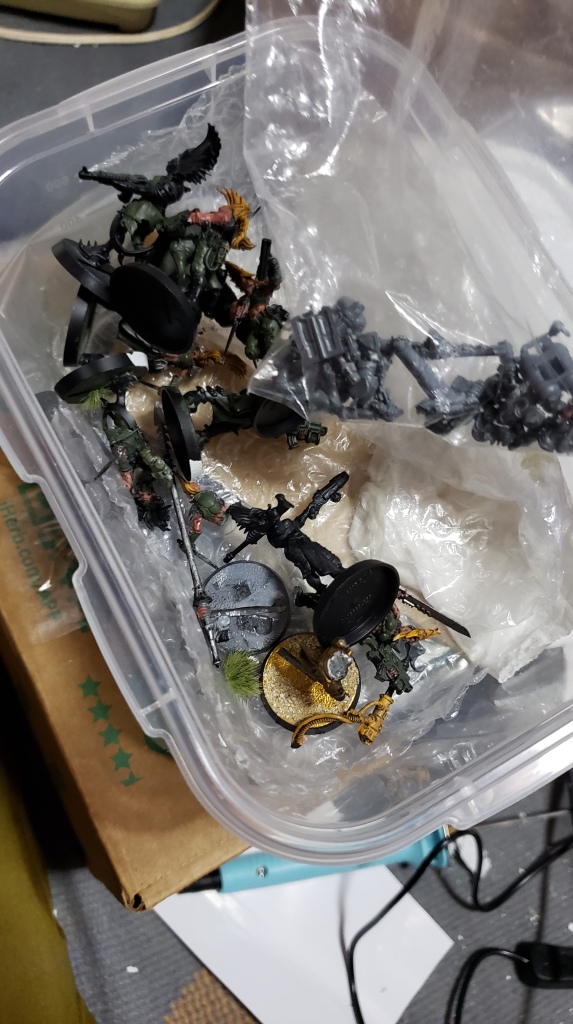
Believe it or not, I still feel the trade was in my favor.
At first I was thrilled with the trade. I got full gang of Escher girls and even a small bag of bits too which I need desperately since my bits collection lacks a lot of what they use in Necromunda.
I love trading models and helping folks get what they want while simultaneously getting rid of what I have a surplus of or don’t want around anymore. When I was getting into 40k, I purchased an absurd amount of Dark Eldar, Eldar, and even some Harlequins models and Tau…And Chaos…And Daemons.. and some IG… Ahhh. Clearly you see that it was a runaway train of greed that ended up in me with quite the shameful backlog. I understand that there are plenty out there who have me beat by miles… but I am not in a comparison with anyone. It’s just me and the plastic. And the plastic clearly was winning as it is wont to.
But for few dark eldar and some other random models I had been advertising, I got the girls and the bits and was thrilled. Sorry I didn’t take more pictures. I didn’t know I was going to have a hobby blog devoted to them until it was too late and they were already in the next stage of development.
Damage Assessment and Surgery
A few of the girls were good to go out of the box, but there was work to be done.
Bolters must have been in vogue or still are since all of these ladies were packing them. Maybe I am not min maxing the gang nastily enough, but I had made my gang with a variety of different weapons some classics (Las Guns) and a few “unpopular”(Not strong in the ‘meta’) choices like the chem thrower.
Needless to say I started to assess my bits, the actual models, and the gang I had been playing with using proxy drukhari wyches and such. And I had to find a way to meet everything in the middle.
Mostly it was a few gun swaps here and there. Putting bodies back on legs and legs standing on bases. I have loads of wyches and with the bits I got I was able to make a couple more gangers bolstering up the roster. My Champion with the shock whip Wild Lightning, and the Chem Thrower Ganger Violetta Duster being the two extras. I will talk about them more shortly.
TLC
The few in particular that needed love were my champions and the chem thrower ganger. It is at this stage I would like to make a confession, as well as a disclaimer regarding what you are about to see.
1. I am not a pro by any means, and by the time I had gotten well into the project of bringing them around I realized too late that they had not been clipped cleanly and stuff like mold lines remained significantly. Some of the models were built in such a way that there are pretty decent gaps here and there which unpainted are pretty unsightly.
2. Some of my weapon and arm swaps are pretty clean, but some are not. Given the gaps in some of the models already I wasn’t too stressed about it. Not to mention that the arms that were pulled/snipped/broken off would sometimes leave ancient petrified super glue clusters which weren’t having any of what I was wanting to do so things got sloppy.
3. I hate stripping models, especially plastic models, and just spray over them losing some detail. While on one hand this is a travesty, on the other hand it means I can goop paint in gaps to fill them instead of bothering to bring out the epoxy or green stuff and wait a billion years for it to dry.
4. Needless to say after reading the above if you are laughing in your seat, then let this be a comedy show for you and if you understand these struggles then let’s keep on with the expose on bringing the girls back to life.
Leader: Raven Sizzleclaw. Shotgun, Chainsword, Pistol. There was a shotgun in the bits and I grabbed an ancient space marine chainsword and carved it down since I saw a picture of the Escher chainsword from forgeworld looking elegant and sexy and wanted something like that. Added a bit from the bottom of an axe with a small loop and stuck on a purity seal like a charm on the end of it. All this was assembled around a hand that held a pistol at a nice angle so she vould thrust the blade forward like ‘GO GET ‘EM!’ She was a pleasure to convert up.
Champion: Rainn Piercer. Needle Rifle, Las Gun. This is my ‘shooty’ Champion. I just added a long barrel to the combi-bolter she was holding, and found some pointy bit that looked somewhat similar to the needler barrel and glued it on where it had been cut off previously. Super painless conversion. Although she doesn’t have a CC weapon yet, I want to equip her with something nice down the line and it makes her look more champion-y.
Champion: Wild Lightning. Shock Whip, Auto Pistol. This is my ‘Melee’ champion. The shock whip is so baller. I have yet to remember the shock trait which is killing me slowly, but she still manages to whoop ass and get XP with little trouble. I used a dark eldar wych for her base since I had a female whip and pistol wych laying around and figured she was pretty much there with a few slices to remove a few spikes and bring her a few steps closer to ganger from S&M Space Elf. A quick gun swap with a plasma pistol (Another future purchase) and she was pretty much good to go. I made a poor choice attemping to use the Escher hair on the head of the model and it looks funky. Like she is wearing a wig or something. I mostly just pray that painting will solve all my problems. (*Spoiler alert* It won’t!).
Ganger with Special Weapon: Violetta Duster. Nightshade Chem thrower. You see the chem thrower on the box, you read about it in the book, and all you are doing is thinking ‘Template? Gas? Badass looking? Hells yeah!” And I knew I wanted one. Besides, me and my buddy are just fooling around and I am not too concerned with crushing or dominating by any means yet. Just learning the ropes. This was a tremendous paint in the ass to convert and I was missing some of the bits that I needed to do it ‘correctly’ so I had to get creative. All that, and I was using another female dark eldar (Gunner this time since the pose seemed easiest to work with/that was what was laying right there) so I was just playing with plastic at that point. I snipped the backpack, glued on the gas tank, and began to figure out how the gun section with its connected protruding pipes, and the arm holding it were going to be reconciled. That, and debating how to connect the tube to the tanks to make it look nice-ish. Long story short, I found a decent arm, and I glued the ever loving hell out of the hand, slicing it down to fit flush with the gun and just let melted plastic do its thing. Positioned it in such a way that the tubes actually managed to be close-ish to the pipe inlet for the gas tanks as well. It took forever, and tried my patience, but ended up looking decent. I threw a knife in her other hand and figured she was pulling back with the right arm to help heft the chem thrower as she sprayed a billowing cloud of yum yum across the battlefield. Seeing it primed made me kind of proud and since the models were funky as is I wasn’t too stressed as long as they looked semi-decent.
The Prime time of our lives
…NOW gonna treat and LIVE… today the (Go and google it now.)
At this stage I was happy enough with the ‘conversions’ I had done and painted them up grey. This was when I noticed how chewed up the minis were since the previous paint job wasn’t terrible, but did cover up small details I hadn’t seen until I painted them grey. My heart sank a bit, but also it freed me from having to ‘perfect’ them while I was painting.
I am getting an actual new in box set of Escher gangers as well because daddy likes bits and daddy wants pretty models too, so this is mostly an experiment in painting to find a decent scheme I like as well getting to know the models without the fear of ‘messing them up’. If it gets me a(n official) gang on the table, then I am happy. I don’t mind proxies at all and just want the dice to roll, but Necromunda has re-lit my hobby fire recently and small skirmish gangs/teams of 10ish models just feels so doable after batch painting 43 kabalite warriors prior to a tournament! And in all honesty it really is.
So I wasn’t too stressed about their condition and ultimately, they were going to eventually end up being the gangers and backup fighters I had when I finally got the new models painted and ready, etc. By then I will have more of an idea of what loadouts I want on what models, a strong idea of my paint scheme and experience painting them so building with painting in mind is possible, and I will also have a usable gang so there is no real time pressure either.
This is the moment we segue into the rant so if you are not down for that, by all means let me know what you think of the girls and the project if you care to. I will get into painting them (With a little better coverage as well) in another article. I am finding that my articles are endless and winding. It has always been part of my ‘stream of consciousness’ writing style, but I still like it. I ‘should’ probably separate the rant from the project log too, but they are related and I think tell a story so that is how I feel about that.\
Why I like it cheap.
vThere are TONS of places to acquire miniatures for the myriad of hobbies where folks build, paint, and play with models and make terrain, etc. I myself enjoy building my dudes off the sprue brand new without a doubt, but I also like the aspect of the rescue. I suppose the cheap price or fact that they are earned in trades as written above is part of the thrill. (Actually the secret 4th aspect of this hobby after Building/Painting/Playing: The Plastic Market/Resale/Trading) But there is a little bit more than that on the topic of what is essentially turning ‘trash’ into ‘treasure’. and I would like to elaborate, if only a little bit, on what that means to me and for the like-minded hobbyist.
The Red Magician’s Junk is the title, of course, and it is a sort of belief and understanding of the concept of junk, or that which is unwanted, unused, or forgotten. And also that that junk, until rescued, reused, or destroyed will have no life and remains in a purgatory of sorts. Am I (and do I) give these items more than a fair share of emotional weight than is perhaps prescribed? I do indeed, but that is part of the magic.
I am drawn to the junk, especially when it calls out to me. To any terrain maker who enjoys making ‘trash terrain’ they will understand what I mean. I have just personally expanded the concept to larger scale. Larger than I shall expound upon here, but all the dear reader needs to know is I take my junk seriously! I also take finding bargains seriously, and revel in the thought that I got something for so cheap or completely free and managed to turn it into something which is the envy of those around me. Maybe envy is too strong a term for it, but I pride myself on getting by with what is available as opposed to dropping all my money and buying brand new. Also I am often broke so I have no choice haha!
So the idea of getting what many consider ‘unusable’ miniatures or just crappy plastic they don’t want anymore for next to nothing is a dream to me. A little glue, some clipping and filing here and there, spray them with primer… and they will be ready for market (And the mark UP! if you nawmean) if that is their fate. Otherwise, I make sure to give them as much love as I can and put them back on the table or at the very least display them proudly.
I love the ‘lot buy’ and reorganizing it slightly and selling/trading it for piecemeal as well. I am not so foolish as to believe that ALL my dream projects will happen and sometimes you just need to say goodbye to some materials or trade them away to consolidate the great plastic horde closer to a project that WILL (Maybe) see the light of day (Hopefully).
Stop Rambling and get back to the point!
So with regards to this ‘rescue’ / ‘rehabilitation’ project, although it isn’t the prettiest, I am hoping that paint will ultimately save me (And the models) bringing them to an acceptable uniform tabletop quality and adding to the flavor and immersion of the underhive that I and my friends are going for. I have only played with 100% fully painted armies on fully painted/decorated tables a handful of times and it is an activity which appeals to me more and more.
So although they are not ‘brand new’ and my techniques may not be perfect or even ‘up to snuff’ in the eyes of some, I am enjoying the hobby, doing it on the cheap, and having a great time with it which is what the hobby (should be) is all about.
It takes a little extra time and a little TLC, but things never come easy to me in matters like these and I always seem to prefer the roundabout way to the straightforward and bought way. Do other people have nicer things than me? Certainly. And there are people yet who have things nicer than those. Which of us is the one looking proverbially ‘up’ at those who ‘have what I don’t’? It was me a long time ago, but I learned that it is more important to look forward taking in what is around you than to always look up and away from the path too often. You lose sight of what you have around you and what matters and lose yourself to the mental struggle of never ‘having enough’.
Eventually people realize that they ‘have to much’ and without a second thought needlessly and carelessly toss those things away like trash. Things which end up somewhere where people can buy them for nothing… or pick them up for free!
Oh yes my friends, delicious delicious junk. Junk which may be the contempt of many, but is nothing but cheap fuel for the fires of my passions and love. Why do those who (must) buy EVERYTHING new have such contempt for those who get by with used junk, handmade ‘trash terrain’, and semi-decent paint jobs? Well I would say it is because we find joy and make use of things that other people tossed away and enjoy it for pennies on the dollar and a little extra time instead of emptying our bank accounts.
Gentle Disclaimer
I am not calling out people who by things new. I buy plenty of things new. If you can manage to participate in these hobbies without buying ANYTHING brand new (Although it is a personal goal of mine often times) then you are a far wiser wizard than I. And I respect your skill, craft, and will follow your blog/youtube channel without a second thought. (Hey Let’s do a collab!)
I just mean that in our hobby there always tend to be players who cosy up next to the warm purr of the great gilded machine lord who gives us our precious plastic in exchange for all our money and take pride that their pretend fighting mans is ‘of a far higher quality’ than my pretend fighter mans’s.
I have run into these people (in real/digital life believe it or not) and felt their scorn and endured their passive aggressive rebuking in public spaces with a grin and nod of understanding. It isn’t worth explaining logic or feelings behind why we do what we do and it certainly isn’t worth my time either.
So please don’t take my words too harshly if you by everything new, or don’t enjoy the hobby aspect, and only build dudes and spray primer them and call it a day. Trust me, you are far from anyone I have scorn for. In fact one of my closest brothers is just such a person and we get on like pigs in a blanket. (Thought I was going to say doodie didn’t you? Well I did, then thought better of it.) I just don’t get on with gatekeepers who present and treat the hobby like you can’t enjoy it unless you BUY BRAND NEW and only use OFFICIAL LICENSED MERCHANDISE, etc. That is their prerogative, but they also must have all of their earned income put forth towards the hobby if that is the case!
Besides, look at the old issues of hobby magazines. Space ships and land speeders made from deodorant containers? GENIUS. Alien plants from a tennis ball and toothpicks? SIGN ME UP! (I Actually made those ages ago. Lost to the ether, but good times.) The dudes who play (Or played) the game and write the rules get it and they aren’t out there cutting throats if people use 3rd party or non-party terrain. They support that energy. When the business gets in the way, of course they are going to suggest using their product. It’s a business and businesses are slaves to the dollar and must act accordingly. But the neckbeards behind the scenes are (I am hoping) the same as they always have been. Why are the rules so shittily written with so many blind spots? Because they are using house rules even though they designed the damn game and aren’t anticipating rules lawyers who are even worse than the hobby gate keepers.
Long story short (Psyche, this story is hella long) is that the more limits you put on fun and creativity, often times, the less fun and creative it becomes. When it comes to enjoying the hobby and gaming, you can do it all with paper and pencil, tokens and a few dice and call it a day. Adding models and 3D terrain is just a fun way to enhance the experience. When people are telling you ‘how’ or the ‘right way’ to have fun, that is when you should know what level of person you are dealing with. And I don’t care for it!
I like my terrain and models cheap, unique, and different from everything else on the table when I can manage it. I like to do it in my own style and rather put effort, love, and my expression into a project rather than money. This blog is all about how
True Conclusion (For the 1st half)
I like my terrain and models cheap, unique, and different from everything else on the table when I can manage it. I like to do it in my own style and rather put effort, love, and my expression into a project rather than money. This blog is all about how I pursue those ends. I also enjoy, nay LOVE to see the creativity and creations of people who do the same. Seeing the before and after of a trash terrain project fro the fully built to the primed stage is nothing short of heaven for me. (And on a further note… perhaps something I will need to post a bit more of!)
My friends and I had just finished up our most recent (And first ever!) Blood bowl season since meeting up had become more and more tricky for various reasons and we were looking for something to play. Sick of 40k and the (not nearly necromundian, but still unreasonable) amount of books with relevant rules spread across them, FAQs, Errata, new material, and a general feeling that a single game was a slog to get through we decided to play skirmish games. Check out the post on ‘What is good?’ when I eventually write it about why. But we played blood bowl and loved it and will keep up with that, but wanted the thrill of a new game and ‘Munda came a’ callin’.
The pandemic of 2020 was in full swing and there was a lot of free time to be had behind a computer so I poured over the rules and was intrigued by the concept of the two (main) terrain distinctions of Zone Mortalis (ZM) and Sector Mechanicus (SM). Essentially 2D tunnel fighting vs. 40K-style open 3d terrain. I loved the idea and after some further research and googling I learned the basics of how ZM worked while the desire to build a cheap set of walls and doors began to mount deep within my soul. And my soul would have its day.
Zone Mortalis Understanding
So at a glance, ZM was the “2D” style of terrain. It reminded me heavily of D&D 3.5’s Miniatures combat or 4th edition D&D grid based combat with how cover worked, but mixed with classic 40K sensibilities. I was (And still am) in love with the idea of a model falling off a railing, hitting the ground, falling again, and again…. but for jumping into a brand new game I thought the sheer amount of movement rules and worries about falling, jumping, climbing, etc. was a bit too much for a first run so the 2-D idea appealed to me.
I like the idea of building a battlefield being part of the game as well, and being able to go a tile at a time between you and your opponent made for some fun and strategic ways to play even before models were set up which also made for some fun (While still being a part of the structured rules with doors, obstacles, loot casket set up, etc.).
After a few games I realized that the ZM style tunnel fighting was brutal af and I play Escher (Essentially speedy elf types with poison) and my buddy plays Goliaths (Ork types which like the choppy smashy) and the close quarters nature of it certainly didn’t seem to do me any favors, but also understanding slowly dawned on me regarding one of the biggest mysteries of my research and when I felt was inherently paradoxical in what the rules said and what was being released by our lords and masters GW.
3D TERRAIN? IN MY ZONE MORTALIS? It’s more likely that you may think…
Indeed. A LOT of the ‘modern’ ZM set ups showed stairways and catwalks despite being what I assumed was a (for all intents and purposes) 2-D environment. Enter the question machine gun of doubt and worry:
-Which walls can you or can’t you climb on? -If we are in a large underground tunnel, are the stair systems in some kind of ‘open’ area? -Is line of sight legit from these raised spots to other more ‘2-D style’ parts of the dungeon (battlefield)? -Isn’t this just sector mechanicus but you’re selling plastic 1′ squares which undermine the principle behind not premeasuring shooting? -WHY CAN’T I UNDERSTAND CELSIUS -OR- FAHRENHEIT ANYMORE AFTER LEAVING THE STATES? …. and many many more.
In Japan, it costs 9,400 yen (about 100 bucks) for FOUR of these delicious tiles. Most if not all missions ask for 6+.I get it, but… come on.
Well, I needed to figure out a way to rationalize all of this in my head and understand why this design choice had been chosen. I came up with this:
ZM as a 2D battlefield is brutal, exciting, and often close quarters mayhem with fun interactions with doors and things like interesting concepts such as battlefield set up regarding tiles, walls, etc. which is (in my opinion) more meaningful than the sector mechanicus style set up.
Also, 2D gaming, while intense, is grounds for more shooty agile gangs to become vulnerable since there is so much terrain blocking LoS, and engagement and close combat are seemingly inevitable if you intent on playing to the mission and there happen to be giant meat necks between you and the loot. This seems like a purposeful design choice, but is also a brutal brutal punishment if you only have one or two opponents and one of them uses templates exclusively, and one of them has CC ability that turns my poor darlings into corpse starch without a second though because damn it I can’t stop rolling 6X on a D66, but I still love this game!
Adding the 3-D elements (Stairs, platforms) to ZM seems to give it a lot more interesting choices since climbing, catwalks, and falling are super fun and integral parts of the game which ZM played ‘vanilla’ just lacks and that is a waste of fun potential. It also allows more agile teams and shooty teams to get their sniper shots and stay out of combat for a LITTLE while longer as well as take advantage of climbing and jumping too to attempt to reach objectives. Also, it is still the fun tile building set up and door/objective placement which allows for cool interactions such as full tile deployments, and cool missions like ‘Escape the Pit’ which remove a tile from the board at a time as the underhive crumbles plummeting into the abyss. Not to mention the close combat and brutal close quarters nature of ZM battles is still there when forces converge along with all the benefits it always had, but a little less punishing than before.
ZM having 3D elements was actually a good idea I felt. It preserves the idea of of Zone Mortalis enough, while including a great many of the fun and exciting rules that make the random and excessive madness of the ‘Munda fun. It also makes missions on ZM tiles a little more “fair” to gangs who don’t care much for the idea that at any moment a gang of renderizing axeswould be swooping around the corner or between me and the objective and the only option felt like eating the axes one juve at a time. But I still have concerns and questions…
That is a ‘renderizer’ serrated axe. It has +2 S, -1AP, 2D, and turns flesh wounds on injury dice into serious injuries on a D6 roll beating the victims toughness. Also, Teun135 ( http://teun135miniaturewargaming.blogspot.com) happily mentions killing Escher’s with themas well. My point is not only illustrated by, but beautifully painted in plentiful amounts of blood for the blood god on the end of that weapon.
Further Questions & Concerns
So I like ZM, and think the 3D additions aren’t bad and add in a beneficial way to the game play and experience. I still have trouble, or rather, would like input and ideas about the following:
Q: With 3D terrain features, and (intended) 2D terrain features, how do you reconcile line of sight over walls?
Idea: I suppose creating a few open ‘arena’ sections of the ZM map where line of sight can be allowed and other areas where it is ‘covered’ or not visible from above may be a possibility.
Q: Or the above when climbing and moving on catwalks essentially ignoring doors, etc?
Idea: As for climbing, perhaps limiting vertical movement to only ladders and stairs and using catwalks. Perhaps(Undoubtedly) I just messed up when we were working with
So I am not sure what to do with the above, but if there are explicit rulings on these facts or perhaps you have a house rule or idea on how to interpret these situations I am all ears.
Enough ranting. Show us the terrain build!
Behold the glory and terrible fury of styrofoam.
So that ‘little’ musing I wrote above was actually supposed to be a lead in to the fact that I was excited to play necromunda and liked ZM and decided that I wanted to cut down on my unreasonable foam supply and make walls, pillars, and door sections for a ZM board using my D&D tiles as a base.
So I did some googling and saw what was on offer online and how other people did it. MDF is very popular, and I eventually came up with the following dimensions (Which I didn’t end up following through with exactly since I am lazy wanted to stretch my foam supply.)
Here is an excerpt from my research notes including delicious details:
So! I opened up the foam closet, grabbed a bunch of pieces roughly the thickness I wanted, and used that as my main component.
That thickness was the base for the doors, and twice that became the thickness for my walls. For the pillars, I used a combination of ‘regular thickness’ foam and a sheet of ‘thicker’ foam to make a proper cube. Long story short, use what is on hand and if you care, make the pillars thicker than the walls. All that matters is the terrain is made, the overwhelming supply is cut back slightly, and you can get the job done.
I measured lengths in 2″ (Single doors and wall segments) and 4″ (Double doors and double wall lengths.) While the walls themselves are a bit thinner than 2″, the ‘pillars’ are closer to 2″ squares thanks to the thicker foam. Happy accident.
Measure and Cut When my original (grandiose) plan and actual materials finally met, I was able to begin the process of making the actual terrain. I actually made a small plan on paper so I logically knew what I wanted to do ahead of time. Breaking down monotonous projects like this one into a few basic steps helps me get into factory mode and crush through it. Check out the plan:
Wow! I even wrote the actual measurements for what I did. Also, I had much higher hopes for my efforts than what I actually put out haha.
So I got to task, and measured out tons of squares and put dots on the ones that I deemed worthy of being called a ‘basic shape’, while the rest would end up in the plastic trash or perhaps used as terrain elsewhere. (*Spoiler alert, I recently cleaned my hobby area and finally allowed myself to throw away the cut ends and remains of styrofoam, etc. I HAD to hold on to for close to who knows how many years. Don’t worry, I still have far more (nice) styrofoam than anyone should own.)
So! I measured, and cut the foam with a straight edge in a sea of ear slitting squeaks in the darkness of the night while my family slept. I then used caulk to stick them together into the shapes I wanted. If I had gotten by foam cutter from WISH sooner than I had, I may have cleaned up the rougher edges. But I did not, so I did not. I used a slicer though and pretty much made them nice.
Mesh and Spackle, AKA Hell.
Spackle everrywhere.
The process of attaching the mesh (A cheap plastic screen used for screen doors from the daiso for 200 yen) which I cut down to size turned out to be annoying to work with. I had it in my mind I would cut some nice lengths, and spackle up the broad sides and top and just lay three sides of the walls in one shot. This was not so because the screen didn’t want to cooperate and had been rolled up for a long time. So I cut it into smaller strips and did a wall facing at a time. This part of the project took a LONG time and I couldn’t do it in short bursts because how messy and intensive it was. I had doubts, friends, but we pressed through..
After they were all spackled, and the mesh was laid on them using the spackle as glue, they dried hard. I trimmed the overhanging bits of mesh into that popcorn bucket which I intend to use for scatter terrain and rubble at the base of other features later on. (*Spoiler alert, I recently took out all the large peices and cut the rest down into a nice mulch of mesh, foam leavings, plaster bits, and various junk I toss in there with the intent of making into underhive detritus. I am excited to work with it in the near future after I finish painting my gang.)
With the 3 of the 5 faces I intended to spackle covered and meshed, I determined that I wasn’t going to mesh cover the sides where walls were intended to connect. Because f dealing with more mesh after all that. I was fairly satisfied after seeing the bunch of them dried, looking nice, and ready for the final build touches.
Final touches before paint.
Thank you to butter and soap boxes everywhere.
At this stage I was happy with them, but wanted a little something to help unify their shapes and my recent forays into youtube and such had me thinking that using this thin card was going to be the way. And it was.
I didn’t bother measuring TOO severely, but cut roughly identical long strips of the card, and then cut those long strips into tons of 2″ mini strips which then became the subject of my next monotonous task. But white glue and tons of time later, and a little creativity with the doors I managed to finish the task. I was quite happy with them at this stage. I cut off the extra bits when they were too long and put them into the bucket of future hive detritus where they shall masquerade as flakes of metal plating.
In particular this was the first time I really worked with this material in this way and as far as embossments and such are concerned, it turns out pretty nice and adds a nice level of depth to what would otherwise be a fairly mundane looking surface. I like the technique and will be using it more in the future as well.
Spray and Pray
So I sprayed them with cheap dollar store brown which I thought had a reddish quality to it. I imagined it like gross muddy brick-like stone. Then I (poorly) made a (crappy) wash from black paint, water, and some dish soap since I saw something like that from Lukes APS on youtube. He is a champion and one of the greats in our hobby for sure. I didn’t follow the recipe exactly and should have used ink instead of black paint. I had the ink too, but forgot about it and just said ‘ahh paint will be fine.’ It wasn’t I wanted more grunge and nastiness… and it didn’t come through like I was hoping.
I was kind of upset, but it still looked decent and I figured it would be dry brushed over anyway. After the brown spray, I added some dripping dark greenish ooze like there was mold or some kind of waste leaking along the walls. In the parts of the wall segments that looked particularly crappy or the mesh refused to cooperate, I assumed that the waste and walls were heavily damaged and went heavier there.
After that I dry brushed the whole thing with a silver color and the effect of the bricks which has a sheeting of mesh metal over them was complete. I thought it looked pretty awesome! Still a bit too much silver for my liking, but I have a game plan going forward. But for the time being I was pretty much done with them.
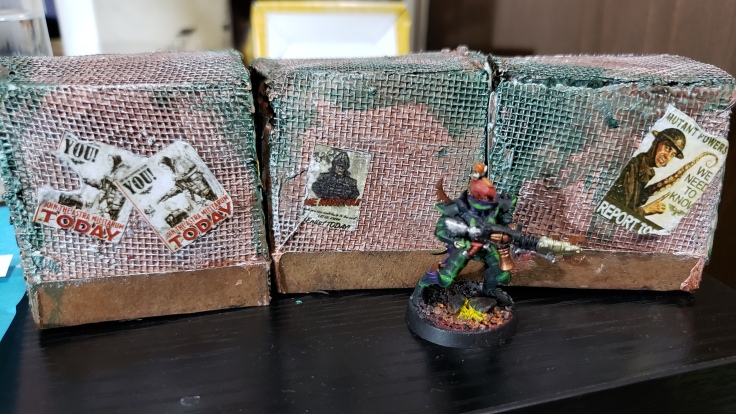
Poster time baby!
When I first saw the nice application of those tiny posters on terrain pieces I loved it. Blown away. Like the tile being slid aside in my ZM tile project or well placed bits, when I see something like that which really convinces the eyes and mind to recognize the scene taking place in the proper scale, it is tremendous. And I had finally gotten a proper paper printer and went to town. Scoured google, facebook, and all manner of forums for a small supply of posters which are plentifully available. Most of them print well enough and it was an experiment all the same.
The open space on the walls needed something to break up the monotony and the posters proved to be an excellent choice. I went for a variety of patterns and even made some look all chewed up with holes and rips and such while I pasted them on. I used a mix of white glue and water and did a coating where I wanted the poster. Placed the poster, then did a coating on the top. I messed around with the poster using my fingers and the brush to damage them. The glue holds nicely and they look great. My favorite part of the walls by far.
You can see how my walls and pillars look when on a ZM style tile as well as set up to be used while playing a game. They look pretty good I think, but they aren’t complete by a long shot. But I don’t think I will take to time to “finish” them until the need arises or the mood strikes.
Future Game Plan / Concerns
So the project is pretty much finished, but they need a little more love to be better than decent. So here is the game plan going forward. If you have any other ideas what could take these tiles to the next level, by all means!
Finish painting the bottom borders. The card at the bottom of the walls forming the border is still brown card. Lazy, but I thought they looked decent enough and I didn’t want to bother. I did a few testers with a light grey and didn’t care for it. But, after doing my ZM tiles, I found another paint I like and will do the borders in a metallic black color which will match the tiles well enough and hopefully add to immersion.
Getting better grungy look with black wash. After the drybrush of silver, they look super bright and could be a lot nastier. My original wash failed, but there is still time to put wash on them again. I think I will be adding more details and my friend is going to do some spray paint looks on the tiles as well. One thing missing from the walls is some free hand spray paint so I want to add more of that. It will certainly take it to the next level.
Emphasize the yucky green. At this stage, the green is more of an afterthought and one person online thought it was a camo pattern. I don’t take it as an insult since camo patterned walls aren’t a bad look at all, but you know. So I think I am going to do a mid tone green in the central parts of the dark green which is drybrushed over with silver to make it feel like its oozing through the grate and slowly sliming down the walls. Maybe even get crazy and do some bright green water effects on the parts near the bottom of those dripping places to really sell it.
And that is that.
I hope that you enjoyed the small musing about ZM tiles and how to use them, and if you have any insight on ruling for line of sight / travel and movement between the more 2D and 3D elements I would be happy to hear about what you think.
I also hope that my simple build for the ZM walls and barriers was slightly inspiring too. I am happy with them and put them into use for almost every game I have played one way or another so far.
I love to make play aids, cheat sheets and ‘handy’ documents.
I find myself often in the position of the ‘arbitrator’ or ‘commissioner’ of leagues, seasons, and campaigns for many of the games and hobby that I enjoy. Although on one hand it is a great burden, it is also a unique opportunity to get familiar with a rules system and a chance for immense satisfaction being the facilitator for the fun.
I am a teacher by trade, and essentially what that means at its core is I take difficult concepts and explain them as simply as possible so that others can get up to speed with the rest of those in the proverbial know. Also, I find it fun and interesting to break concepts down and re-write or re-word them in such a way that they are easier and quicker to access for people trying to learn.
Can you see the echoes of all the players who didn’t spend any time reading the rules of games in the background of my life just now? Because like phantoms they are always with me. I like to solve problems, not gripe about them online and blame anyone and anything that will lend me an ear. One of the reasons I just laugh whenever my curiosity gets the better of me and I end up getting up to my ankles in the squalid mud that is the comment thread below a video or article from time to time.
Anyway, the point of that is I like to solve problems, and games like Necromunda which are filled to the BRIM with crunch (And just as much flavor in my opinion) need some help! At least if you need to organize things, and other people need to be expected to send information to you after a match or take notes during it, it doesn’t hurt to have a template.
This is my first version of the Necromunda one, and I have one for blood bowl as well which I may share later on if/when the mood strikes. I haven’t used it yet, but I think it has just about everything i’d want to take note of for recording purposes including what the arbitrator needs to know as well. I don’t have any space for the hired guns or advancements, but I figure that hired guns and such will (hopefully?) end up on the crew log if they are participating and will be (should be) on the regular roster anyway. As for advancements, this could be noted on the skirmish sheet as having taken place, but it should be noted on fighter cards, rosters, and affect their total XP anyway so I am not too worried about that either. As long as folks are honest.
I am using yaktribes campaign manager and giving that a try too. Been doing a ton of research, and hobby fun to get ready for my first skirmishes and it has been a blast. This is the last bit of prep I have done before my first gaming marathon this weekend. Totally psyched to play (hopefully 4, but probably 3 game of) Necromunda and see my Escher girls grow into Escher Killer Queens. Or at the very least, not get stomped too badly into the grime of the underhive.
If you enjoy my cheat sheet or want to hear more about my blood bowl stuff or other things about Necromunda I am happy to share my ideas with anyone willing to reach out. Until next time.
Feel free to scroll to the bottom after looking at the pictures if you don’t want to read my ranting and just want a step by step breakdown of my process.
Inspiration From the Ether…
Photos used with permission from @fabricatorminiatures . What a champ. Look at that tasty weathering!
showing off their cardboard ZM tiles and was blown away. This is the case with many of our ilk, terrain builders, hobbyists, painters, creators, and musers of the realms and beyond. We see something badass and have no choice but to awe in wonder at how it was done.
I am a fan of countless terrain pages on FB and Reddit and the like, and my feeds are filled to the brim with inspiration and images of like minded folk all in pursuit of a similar goal. I had to attempt to forge something similar.
Humble Beginnings
‘Measuring’ and cutting the squares (Big and small) wasn’t as nightmarish as I feared.
Here is the start of the project. I saw the inspiration, then looked at my carefully curated supply of crafting materials (the piles of crap I have laying around cluttering my home slowly gaining ire from my partner) and finally found a use for the huge poster boards I got from a friend who used them for teaching materials. I was thinking I would use them to make blood bowl pitches or something, but when the need arose for a handful of 12″x12″ square tiles, their thickness was perfect and I began to slice.
I measured out (ROughly) 2″ squares and put a dot at the intersections to save my already dying marker. My measurements on the large and small tiles were questionable at best ranging between 11.5″ ~ 12.5″ per side. You can’t premeasure in necromunda and having perfectly uniform 2″ square tiles in zone mortalis (As GW’s badass looking plastic ones have.) feels like it betrays the intent behind not premeasuring. Or so I tell myself. I measured small squares at roughly 1.75″ in order to fit well and leave some space and also accommodate the lack of/extra space due to my wonky measuring.
I also had a really nice cardboard box with thin fairly pressed down cardboard which would have the nice look as Fabricator General’s tiles too. I needed (36 per tile x 7 tiles = 252 tiles of lord why) a lot of tiles and ended up cutting most of them from the ‘nice’ cardboard (Thank goodness I saved it!) and had to resort to ‘regular’ cardboard (Thick, double layered, good for packing but for necromunda floor tiles, slightly too large which will slowly eat away at my soul forever.) for the remaining tiles.
Cutting was fairly painless. I measured out grids on the cardboard putting dots on the ones that were ‘full size’, cut them into long strips and then machine gunned out the singles a strip at a time. I saved the corner bits and half bits (That were not honored with the dot of full size) since I had a feeling I would be using them…
Gluing things to foam is tremendously annoying and I used caulking and when I ran out of caulk and didn’t have time to buy more, hot glue to secure the tiles. It worked like a dream and the foam was fine. I have a cheap crappy hot glue gun so it doesn’t get hot enough to melt the foam unless I leave it alone for a long time.
Tile Design & Experimentation
This was the fun part. I made one tile (The first tile) just plain with nothing fancy on it. I wanted to see what it looked like with the cardboard tiles and if I was wasting my time or not. I was pleased with the result and then began to leave a tile or two empty to add in some flair. In the inspiration image Fab Gen had a tile slid aside revealing an access hatch of some sort and that multiplied my immersion to the point of no return so I knew I needed something like that for my tiles too.
Mostly I just glued/caulked down some screen mesh (Plastic junk screen from the daiso AKA dollar store) and then cut up some of the card paper from a butter package into strips and formed a barrier around the sides by gluing them down. I then placed chunks of cut tile(cardboard) to look like they were slid aside, or perhaps sliced/broken open from use/battle revealing the delicious grating below. Sometimes I added an extra bit here and there or used a different type of material than the mesh. I wasn’t concerned about them being exactly the same and just wanted variety.
It was about that time I remembered that my buddy tossed me these foam bricks with adhesive meant to be wall decorations, but their rough pattern and shape called out to me, I cut them in such a way that they became a crater of sorts, and decorated with straws, chips of cardboard, and other junk. Whatever grenade went off there blew up a water/sewage pipe and it was going to be full of the yucky yuck by the time I was done with it.
End of the Build Phase
They still look like garbage, but are shaping up.
This is one of the best phases of terrain building for me since it involves making a huge mess, gluing without second thoughts, and seeing the bits box and terrain supply pile finally take the long deserved hit to make it less than before. Almost enough to convince you that someday you won’t have anything left in there and your job will be complete…. (This will never be the case. Stop lying to yourself. The terrain bitz box will only GROW.)
Now that the voices are gone, I glued down some bits here and there, sprue chunks, straws, weapons, props and accessories, and plenty of good stuff in that crater.
I gave the tiles themselves a proper slathering of white glue/Spackle (Wall Filler)/Water and let them dry for a bit. Do to my impatience this meant that when I finished with tile 7, I went to tile 1 and continued with the next step of the process regardless if it was dry or not. I live dangerously, I admit.
I then laid down a mixture of spackle (Wall filler), white glue, and water again, trying to go for a thicker mixture which would fill in some of the cardboard corrugation gaps, protect the foam, and be an ideal bedding for the ballast mixture (Sand, ballast, and small stones) I was thinking was underhive detritus. I usually make buildings with rubble so I use this stuff all the time and was not (And in all honesty am still not) 100% sure it was a good idea.
In Fab Gen’s picture, he gets a much finer look which isn’t as rocky or gritty and looks better than mine I think. In all honesty this was the first time I ever based something which I willed to be Necromunda terrain and need to get my system down. My 40k ruins building technique just kicked in automatically and before I knew it the deed was done.
The Magic Moment A.K.A Spraying
This is the best part of almost any terrain project.
So I sprayed them black. I use a cheap matte black spray paint from the dollar store since I clearly have no respect for terrain. It is still shiny and each can barely lasted enough to spray 4 or 5 tiles before it ran out of paint. Is there a better way? Sure. Would that mean paying more than 100 yen (About a buck) per spray can? Undoubtedly. What do I do? Use cheap crappy dollar store spray paint without looking back holding my head up high baby. I then used some brown spray paint (Also Daiso) and kind of just hit the cracks between tiles and hit the spots where the black didn’t take or the foam was melting (Further melting it if my glue/spackle had missed that spot…) and generally sprayed randomly to offset the black a little bit. The above pictures are the result.
I say I love this part of the project because it is when it all comes together. Soda cans and straws stop becoming trash and start to transform into reservoir tanks and leaking pipes at the press of a button. The tiles also did the same for me. United in black and brown spray, the cardboard, foam, and junk started to look decent. I already liked them at this stage, but they needed some more love.
Painting: Early Phases
I am not done with them completely, but they are pretty much good to go for now!
I really wanted a lighter grey color tile and brought out my standard three-grays that I use for doing ruins and buildings. Dark grey base, drybrush with mid gray, and finer drybrush with the lightest grey. (I used both spellings of grey. I prefer ‘grey’ in principle, but typing ‘gray’ feels better. So… Sound off in the comments below.)
I painted the tiles with a watered down dark grey, then did an outline on the tiles of the mid gray. (Yeah the spelling thing is annoying me too, but we will make it through this.) The tile outlines were extremely bright and not subtle at all. At this juncture it became a ‘design feature’ (..Yep) and I committed fully. I picked out some bits with copper, some bits with gun metal, and some bits with silver. I also copied the hazard tiles with yellow and black which look awesome. I didn’t bother with tape, I just went back and forth with the colors until it looked decent-ish.
Current struggle / I put them away after using them the other day and won’t work on them anymore until I have clarity since they are decent enough to play with
Wow what a heading. That one got away from me.
Just one more… for the road.
Ok no more. I promise. On to what my current struggles with the project are.
Tile Colors: A, B, or C? Grout Colors: X, Y, or Z?
Current struggles. So I am currently experimenting with how I want to finish the tiles and got some feedback from a friend, but am still at a loss and wouldn’t mind some input from the internet.
In the above images you can see the tiles I took from the basic base coat to the next stage in various experimentation. Which do you prefer? How could they be improved?
Tile Colors (What Wash looks good):
A: Leave as is a.k.a. no wash. B: Use the cheap dollar store ‘metallic black’ watered down look. C: Use the cheap dollar store ‘black’ watered down look.
(I personally like B and think having a slight sparkly metallic sheen is nice and sells that they are metallic. But black doesn’t look bad either. Any ideas?)
The Grout Colors:
X: A very watered down copper. (Like a sort of rusty collection of rocky chunky metal shavings?) Y: Watered down Copper, Watered down black metallic, And some watered down brown to cover the rest. Makes it feel more dirty and nasty while dampening the copper and black metallic. Z: Watered down copper, and watered down black metallic. Dampens the brightness of the copper a bit, but not too much.
Game plan (Prior to input):
1. Finish Painting I like the brown, but after discussion with a friend the copper might be too bright. I REALLY like the rust effect Fab Gen used with the metal around the cardboard tiles, but I think placing the ballast might have made achieving that tricky. So I am considering maybe using oranges and reds to get a rusty look instead of using the metallic since its too shiny and doesn’t sell rest well enough. (I just have inane fears of using ultra watered down reds and oranges on my freshly completed tiles!) Do some reds and oranges, then cover it all up with browns and dry brush it all with a brown and a grey color to simulate the dirt and dust winning the battle against the rust and grime down below it. This will also help unify each of the tiles as well and bring some of the runaway details back under control.
2. Pour in the crater with some water effects. I adore green slime ponds and after placing the broken pipes I knew this was going to be a crater filled with slime. I have done it before on older projects so it won’t be a problem. Most likely the final touch that shows me it is completely done.
Other Issues:
– My excessive use of watered down paints, glue/spackle water as wash, etc. has warped the tiles enough for it to be annoying. ProposedSolution -> Saw Wyloch explain that spreading white glue onto the back end of the tiles and 24 hours to fully dry will pull them back into alignment. I am pretty sure it will work like a charm and if not, I will just use them as is anyway. Here is Wyloch’s channel. (https://www.youtube.com/channel/UCrKJd7jQ989DZvtf5C69mYA) He has a ton of excellent technique and a bit more precision than I am able to include into my projects, but he is an inspiration as well.
CONCLUSION (And TL;DR)
So the project is about 75 percent done I think and has already been used to play a few games and the immersion is quite nice. I am already really happy with my work and having proper tiles to play ZM games in Munda using my wall and door segments has been a blast. I will eventually finish them off, perhaps after getting a little bit more feedback, or maybe whenever I manage to get a little bit of extra time and my Escher Girls are painted and my Halflings in Blood bowl are done too.
I hope you enjoyed checking out the tiles and seeing the process I used to make them. I like to keep it cheap and loose. I don’t play tabletope wargaming worrying about 1/4″ or even 1/2″ of distance… (Not counting fall risks since people falling multiple stories is my current dream in Munda. That and shooting drugs into a Goliath neck from my needle rifle’s Chem darts and getting them addicted to Obscura.) Like I was saying, I don’t play these games with people stressing over fractions of an inch and don’t really want to either. So having the board be less than a perfect 12″ square is fine for me. And I don’t need nice materials either, and I sure as hell am not paying a billion dollars or whatever for plastic squares! I can’t do it!
Feel free to let me know what you think in the comments and I hope to hear from you soon. Until next time,
TRM
TL;DR
HOW TO MAKE CHEAP ZONE MORTALIS TILES by THE RED MAGICIAN 1. Cut 7 1′ foam tiles. 2. Cut 252 1.75″ cardboard squares. 3. Hot glue/ Caulk cardboard squares onto foam tiles. 4. Apply bits and creative variation as desired. 5. Wash entire tops and sides of all surfaces on tiles with watered down PVA glue (And Spackle if available.) 6. Sprinkle ballast as desired. 7. Spray whole tiles black. Spray tiles lightly with brown. 8. Paint cardboard tiles preferred color. Paint grout preferred color. 9. Good enough for someone who can’t bother to read my article! 10. LIKE COMMENT SUBSCRIBE PATREON AMAZON AFFILIATE LINKS ONLY FANS GIVE ME YOUR MONEY! (This is a joke. It may very well be an omen too though…. Thanks for checking out the page.)